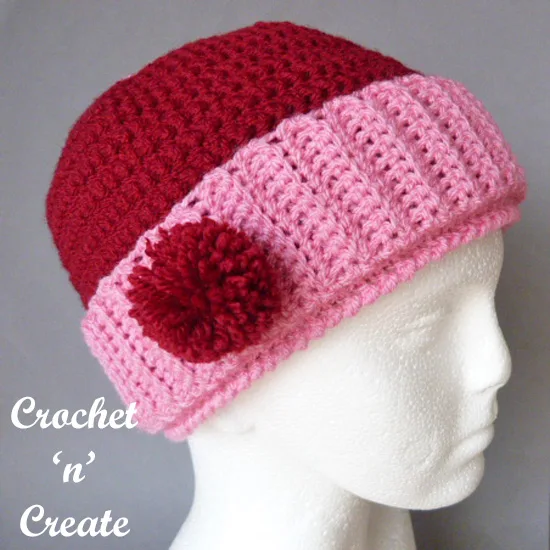
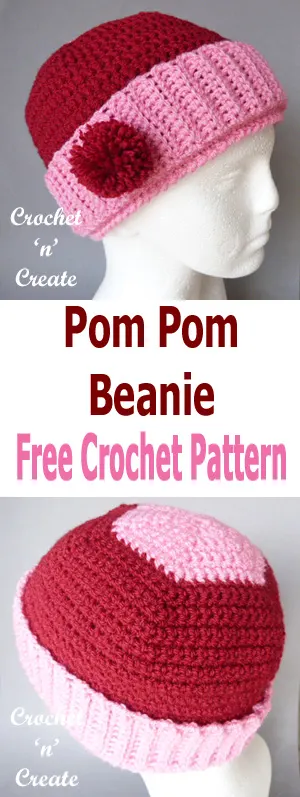
This crochet pom-pom beanie hat uk format, has been made in dc stitch, using Double Knitting yarn and a 5.00mm crochet hook, the pattern matches my adult mitts uk pattern, when put together they will make a lovely gift set for someone.
See my FREE crochet Sedge Stitch Slouch & Frilled Brim hat — patterns.
* * * *
Crochet Pom-Pom Beanie Hat uk CNC101
Scroll down the page for FREE pattern
Find all my FREE crochet patterns HERE
Abbreviations
RS. Right Side
ch. Chain
dc. Double Crochet
rpt. Repeat
ss. Slip Stitch
flo. Front Loop Only
blo. Back Loop Only
Crab Stitch. Working left to right work dc backwards
Click here to see my pictorial on the Crab Stitch
Magic Circle. Click here to see a pictorial on this
Base of ch. Work into first stitch
Size to Fit: Adult Head
Materials
For great results it is always best to use the recommended yarn I have used:-
35 grams of Paintbox Simply DK in colour 1
45 grams of Paintbox Simple DK in colour 2
TENSION – 4dc & 6 rows measures approx 1 inch
******************************************************************
With colour 1 make magic ring, (RS) work 6dc into ring, ss to first dc on beginning of row. Turn. (6dc)
Row 2 – 1ch, 2dc into base of 1ch, 2dc into each dc to end, ss to first dc on beginning of row. Turn (12dc)
Row 3 – 1ch, 2dc into base of 1ch, 1dc into next dc, * 2dc into next dc, 1dc into next dc, * rpt from * to * to end, ss to the first dc on the beginning of row. Turn (18dc)
Row 4 – 1ch, 2dc into base of 1ch, 1dc into each of next 2dc, * 2dc into next dc, 1dc into each of next 2dc, * rpt from * to * to end, ss to first dc on beginning of row. Turn (24dc)
Row 5 – 1ch, 2dc into base of 1ch, 1dc into each of next 3dc, * 2dc into next dc, 1dc into each of next 3dc, * rpt from * to * to end, ss to first dc on beginning of row. Turn (30dc)
Row 6 – 1ch, 2dc into base of 1ch, 1dc into each of next 4dc, * 2dc into next dc, 1dc into each of next 4dc, * rpt from * to * to end, ss to first dc on beginning of row. Turn (36dc)
Row 7 – 1ch, 2dc into base of 1ch, 1dc into each of next 5dc, * 2dc into next dc, 1dc into each of next 5dc, * rpt from * to * to end, ss to first dc on beginning of row. Turn (42dc)
Row 8 – 1ch, 2dc into base of 1ch, 1dc into each of next 6dc, * 2dc into next dc, 1dc into each of next 6dc, * rpt from * to * to end, ss to first dc on beginning of row. Fasten off. Turn (48dc)
Join in colour 2.
Row 9 – 1ch, 2dc into base of 1ch, 1dc into each of next 7dc, * 2dc into next dc, 1dc into each of next 7dc, * rpt from * to * to end, ss to first dc on beginning of row. Turn (54dc)
Row 10 – 1ch, 2dc into base of 1ch, 1dc into each of next 8dc, * 2dc into next dc, 1dc into each of next 8dc, * rpt from * to * to end, ss to first dc on beginning of row. Turn (60dc)
Row 11 – 1ch, 2dc into base of 1ch, 1dc into each of next 9dc, * 2dc into next dc, 1dc into each of next 9dc, * rpt from * to * to end, ss to first dc on beginning of row. Turn (66dc)
Row 12 – 1ch, 2dc into base of 1ch, 1dc into each of next 10dc, * 2dc into next dc, 1dc into each of next 10dc, * rpt from * to * to end, ss to first dc on beginning of row. Turn (72dc)
Row 13 – 1ch, 2dc into base of 1ch, 1dc into each of next 11dc, * 2dc into next dc, 1dc into each of next 11dc, * rpt from * to * to end, ss to first dc on beginning of row. Turn (78dc)
Row 14 – 1ch, 1dc into base of 1ch, 1dc into each dc to end, ss to first dc on beginning of row. Turn.
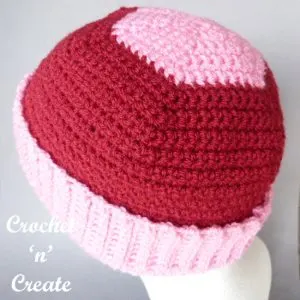
Row 15 to 35 – Rpt Row 14. Fasten off. Turn.
Row 36 – Join in Colour 1 and rpt Row 14 once. Fasten off.
Brim – Using colour 1 make 11ch, 1dc into 2nd ch from hook, 1dc into each ch to end.
Turn.
2nd Row – Working in blo (see abbrev) work 1ch, 1dc into base of 1ch, 1dc into each dc to end. Turn.
Rpt 2nd Row until 78 rows have been worked in all.
Fold work in half (from bottom to top) so that the short sides of both ends are lined up, ss along through both sides of work to make a round.
Turn your work on to the side so you are working into the row ends.
Make 1ch, work 1dc into each of next 78 row ends to end, ss to first dc on beginning of row. Turn. (78dc)
Attach Brim
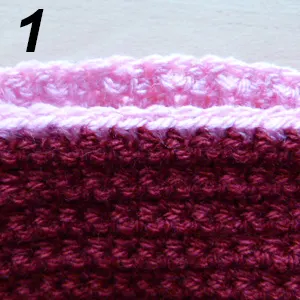
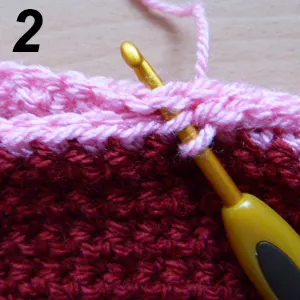
With RS of the hat facing, working along Row 36, place brim on the inside of hat, (see pic 1) ss into each of the next 78dc to end working through flo (see abbrev) on hat and both loops on brim (see pic 2) ss to first ss on beginning of row. Fasten off.
Fold back brim on to front of hat (over the ss).
Working into loose loops on bottom of brim, work one row of crab stitch (see abbrev)
along to end, ss to first dc. Fasten off.
Make 1 small pom-pom, I used a Clover pom-pom maker number 35
Finishing – Weave in and trim off any loose ends of yarn, attach pom-pom to brim decoratively.
Hope you enjoy making this lovely warm crochet pom-pom beanie hat uk pattern.
Don’t forget to pin it.
Bye for now!

*******************************************************************
All pattern sizing, yarn weights, gauges etc on this website are approx as everybody crochets differently. Every effort is made to ensure this pattern is correct, but I am only human so mistakes may be made, if you find one please let me know by e-mail on [email protected]
The written instructions and pictures for this free crochet pom-pom beanie hat uk pattern are copyrighted to crochet ‘n’ create © 2018.
You are welcome to sell the finished products made from the free crochet pom-pom beanie hat uk pattern, I just ask that you please use your own pictures and put a link back to crochet ‘n’ create.
If you wish to tell your friends and followers about this pattern, please only use a direct link to the pattern page on crochet ‘n’ create.
DO NOT share the written instructions for this crochet pom-pom beanie hat uk pattern.
* * * * * * * * * * * * * * * * * * * * * * * * * * * * * * * * * * * * * * * * * * * * *

