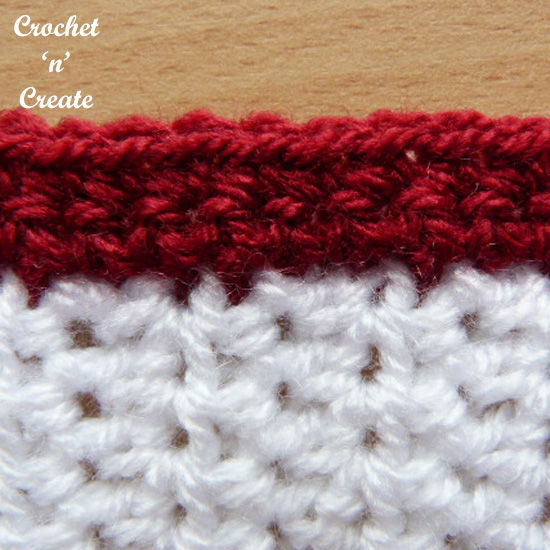
My crochet neat edge pictorial is to show you how to get an even look when making a contrast border.
Have you ever wondered when using a second color why it appears to look rough and uneven, my pictorial below shows you in four steps how to improve the look.
See my Crab Stitch and Magic Circle Pictorials.

Crochet Neat Edge Pictorial
Hope you like my pictorial on this technique, I use it a lot in my straight edge designs to give a nice clean look i.e blankets, place mats, dishcloths etc.
Abbreviations
USA or UK
ch. Chain(s)
sc/dc. Single Crochet, (Double Crochet UK)
sl st. Slip Stitch
WS. Wrong Side
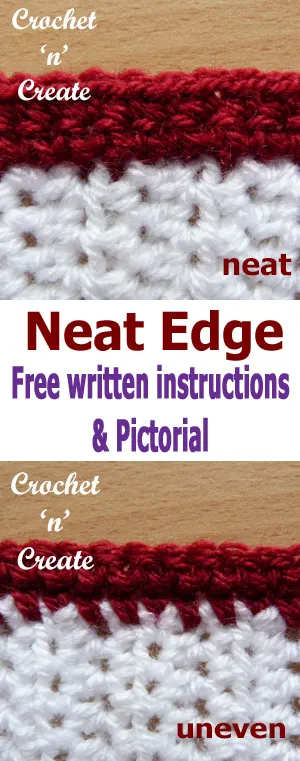
My first two pictures are of an uneven and even look, they show you how your work looks when working directly in the edge and when you work in a sl st edge.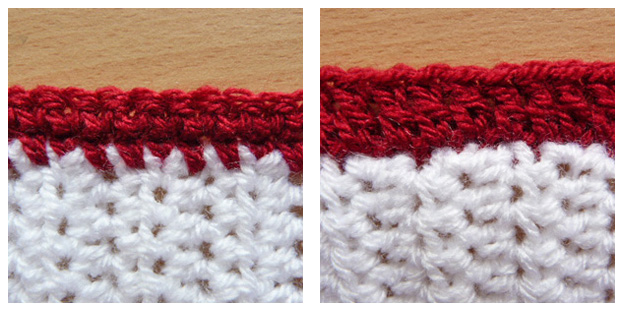
 1) Starting at the beginning of the edge on your work, sl st evenly along edge to end. Turn.
2) (WS) For this tutorial I have used sc/dc UK, I made 1ch ready to begin my row.
You can use any stitch that you want, just make the appropriate number of ch’s at the beginning of your row.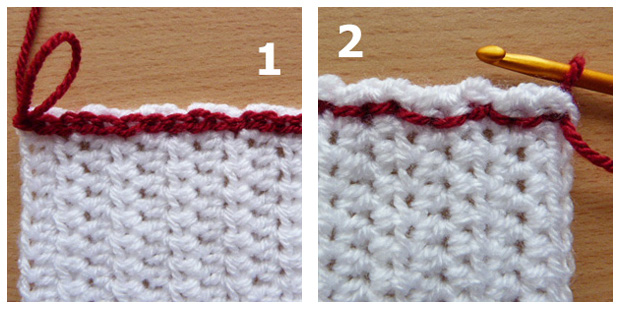
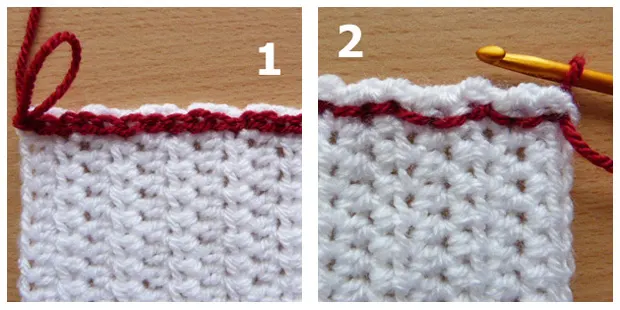 3) Insert hook under both loops of sl st.
4) Work sc/dc UK in the normal way.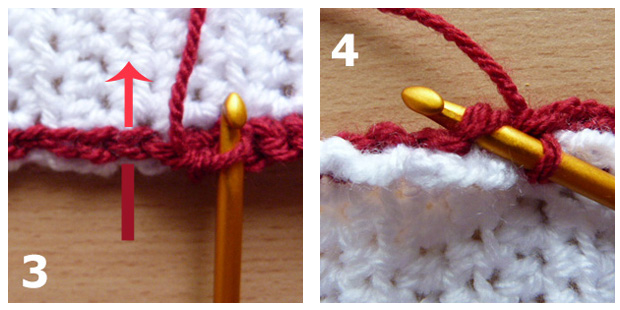

This method is a really simple and an easy one that gives you a more professional style to your projects, hope you find it useful.
Don’t forget to pin it for later.

Speak to you soon, bye for now.


****************************************************
The written instructions and pictures for this free crochet neat edge pictorial are copyrighted to crochet ‘n’ create © 2017.
You are welcome to sell any finished products made from this crochet neat edge pictorial, I just ask that you use your own pictures and put a link back to crochet ‘n’ create.
If you wish to tell your friends and followers about this crochet neat edge pictorial, please only use a direct link to the page on crochet ‘n’ create.
DO NOT share any of the pictures or written instructions in this post.
* * * * * * * * * * * * * * * * * * * * * * * * * *
Janet
Tuesday 1st of May 2018
Thank you for sharing! A very easy and simple solution.
Judy
Saturday 17th of March 2018
Very nice, lovely looking edge, I will try this for sure. Thanks.