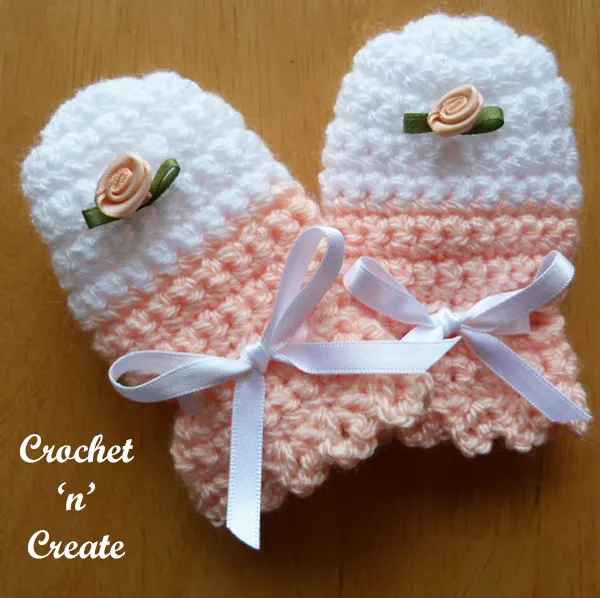
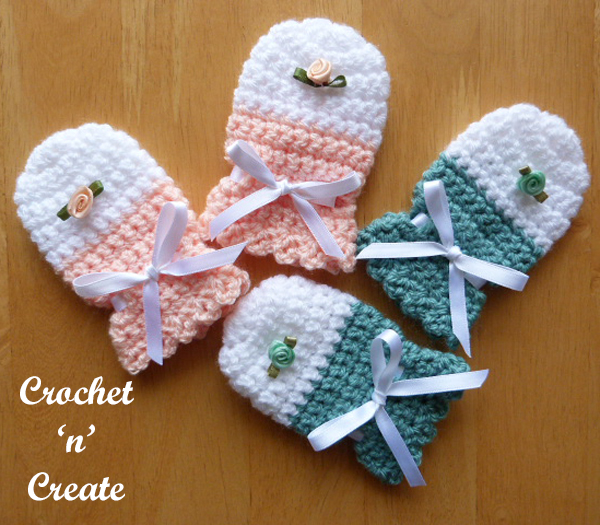
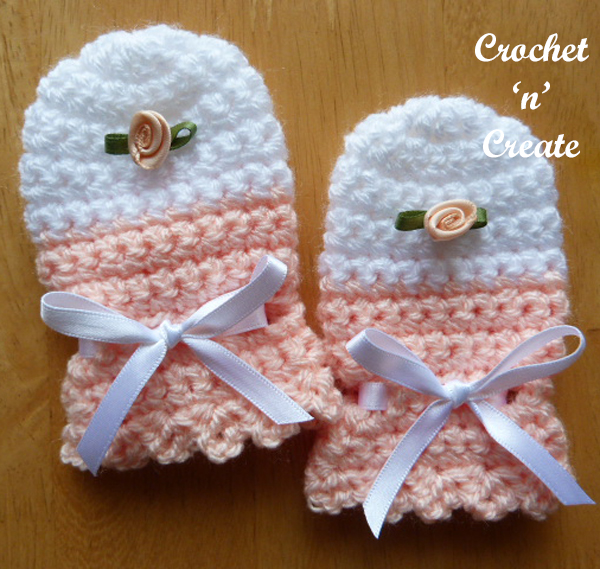
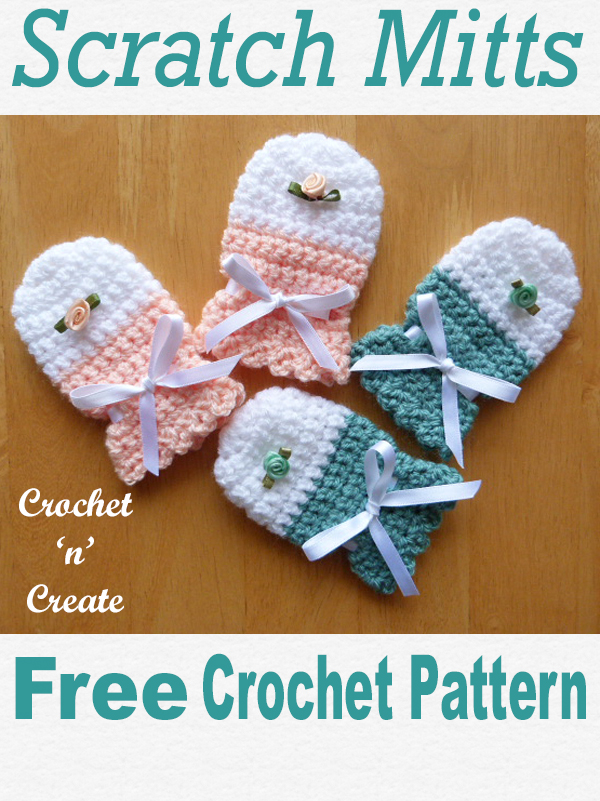
Aww I love designing anything for babies, these thumb less baby scratch mitts are so cute, warm and cozy, easy to pull on and with a tie ribbon bow they will stay on.
Designed to fit a 3 to 6 month baby, they are quick to crochet and make a lovely gift for baby showers etc, you can find the free crochet pattern below in UK and USA format, just scroll down to get it.

Disclaimer: This site contains affiliate links. If you make a purchase after clicking on an affiliate link, I may receive a small commission (at no extra expense to you)


* Pin this pattern to your Pinterest Boards
* Share this pattern on Facebook

* * * *
Scroll down the page for the FREE pattern
OR
* Purchase an (advert free) PDF from:
crochetbabypatterns
* * * *

Baby Scratch Mitts UK
Pattern Number CNC16
Abbreviations UK
RS. Right Side
ch. Chain
dc. Double Crochet
tr. Treble Crochet
rpt. Repeat
ss. Slip Stitch
Base of ch. Work into first stitch
Finished size approx: 3-6 Months
Materials
I have used:-
Small amounts of Stylecraft Special DK in colours 1 & 2
OR an equivalent yarn i.e
Small amounts of Worsted Weight #3 in color 1 & 2
a suggested yarn for this would be Red Heart Baby Hugs Yarn
4.00mm crochet hook, small amount of 6mm ribbon and 1 ribbon rosebud
TENSION – 5dc and 5 rows measures approx 1 Inch
**********************
Scroll down the page for the USA format
UK INSTRUCTIONS:
Using colour 1 make magic circle, work 3ch, (RS) 9tr into ring, pull loose thread to close circle, ss to top of 3ch on beginning of round. Turn. (9tr + 3ch)
Round 2 – 1ch, 2dc into base of 1ch, 2dc into each tr to end, ss to first dc on beginning of round. Turn. (20dc)
Round 3 – 1ch, 2dc into base of 1ch, 1dc into each dc to end, ss to first dc on beginning of round. Turn. (21dc)
Round 4 – 1ch, 1dc into base of 1ch, 1dc into each dc to end, ss to first dc on beginning of round. Turn.
Rpt Round 4 until 8 rounds have been worked from beginning. Fasten off.
Join in colour 2, rpt Round 4 until 13 rounds have been worked from beginning. Turn.
Round 14 – (Eyelet Holes) 1ch, 1dc into base of 1ch, 1dc into next dc, * make 2ch, miss 1dc, 1dc into each of next 2dc, * rpt from * to * to last dc, make 2ch, miss last dc, ss to first dc on beginning of round. Turn. (7 eyelet holes)
Round 15 – 1ch, 1dc into base of 1ch, 1dc into each 2ch space and dc to end, ss to first dc on beginning of round. Turn. (21dc)
Rounds 16 & 17 – Rpt Round 4.
Round 18 – (picot row) 1ch, * (1dc, 3ch, 1dc) into next dc, miss 1dc, * rpt from * to * to end, ss to first dc. Fasten off.
Finishing – Weave in and trim off any loose ends of yarn, thread ribbon through eyelet holes on wrist and tie in a bow, decorate with a ribbon rosebud.
USA format below:-
Baby Scratch Mitts USA
Pattern Number CNC16
Abbreviations USA
RS. Right Side
ch. Chain
sc. Single Crochet
dc. Double Crochet
rpt. Repeat
sl st. Slip Stitch
Base of ch. Work in first stitch
Finished size approx: 3-6 Months
Materials
I have used:-
Small amounts of Stylecraft Special DK yarn in colors 1 & 2
An equivalent yarn would be light worsted weight #3
4,00mm crochet hook, small amount of 6mm ribbon
GAUGE – 5sc and 5 rows measures approx 1 Inch
***************************************************************
Using color 1 make a magic circle, ch3, (RS) work 9dc in ring, pull loose thread to close circle, sl st to top of ch3 on beginning of round. Turn. (9dc + ch3)
Round 2 – ch1, 2sc in base of ch1, 2sc in each dc to end, sl st to first sc on beginning of round. Turn. (20sc)
Round 3 – ch1, 2sc in base of ch1, 1sc in each sc to end, sl st to first sc on beginning of round. Turn. (21sc)
Round 4 – ch1, 1sc in base of ch1, 1sc in each sc to end, sl st to first sc on beginning of round. Turn.
Rpt Round 4 until 8 rounds have been worked from the beginning. Fasten off.
Join in color 2, rpt Round 4 until 13 rounds have been worked from beginning. Turn.
Round 14 – (Eyelet Holes) ch1, 1sc in base of ch1, 1sc in next sc, * ch2, skip 1sc, 1sc in each of next 2sc, * rpt from * to * to last sc, ch2, skip last sc, sl st to the first sc on the beginning of round. Turn. (7 eyelet holes)
Round 15 – ch1, 1sc in base of ch1, 1sc in each ch2 space and sc to end, sl st to first sc on beginning of round. Turn. (21sc)
Rounds 16 & 17 – Rpt Round 4.
Round 18 – (picot row) ch1, * (1sc, ch3, 1sc) in next sc, skip 1sc, * rpt from * to * to end, sl st to first sc. Fasten off.
Finishing – Weave in and trim off any loose ends of yarn, thread the ribbon through the eyelet holes on wrist and tie in a bow, I have decorated with a ribbon rosebud, but this optional.
I hope you enjoy making these baby scratch mitts.
* * * *
I have free crochet baby pattern outfits, see also:-
Newborn Baby Dress Set – Baby Popcorn Set – Baby Sweater Set
Smarty Pants Set – Babies Picot Set – Angel Dress-Pants Baby Set
* * * *

The written instruction and pictures for this free scratch mitts pattern are copyrighted to crochet ‘n’ create 2017. You are welcome to sell the finished products made from this free baby scratch mitts crochet pattern, I just ask that you please put a link back to crochetncreate.
If you wish to share this pattern on social media or your blog please only use a direct link to the pattern page on crochet ‘n’ create.
Imelda
Sunday 29th of April 2018
Thank you very much for sharing your patterns. I’m only back doing crochet after about a 50 year absence. Started very young but rem the basic stitches. But never had the UK v US experience so I love it when pattern makers either identify which is which or give the option to choose one version.
crochetncreate
Friday 4th of May 2018
Your welcome Imelda, hope you enjoy crocheting them.
Kimberly
Saturday 11th of March 2017
Seems like a baby that age would put mitts in mouth and could choke on flower decorations by sucking on them. I love the pattern, I just leave off flower.
crochetncreate
Sunday 12th of March 2017
Yes Kimberley, the flower was only put on for decoration and photographic purposes. It's up to the individual to adorn as they wish. All my rosebuds, flowers etc are always optional.