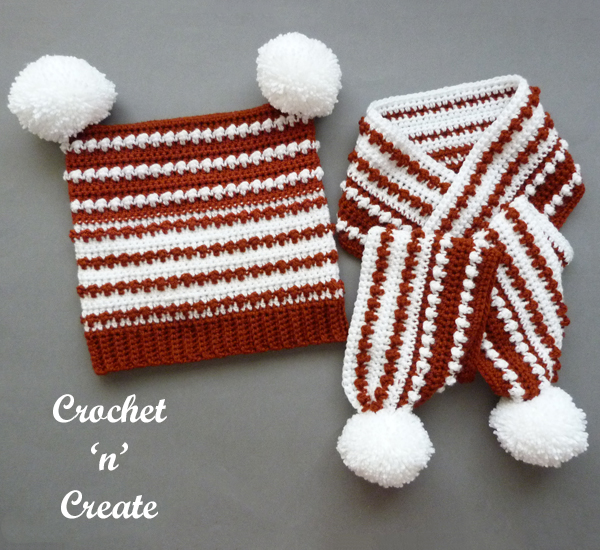
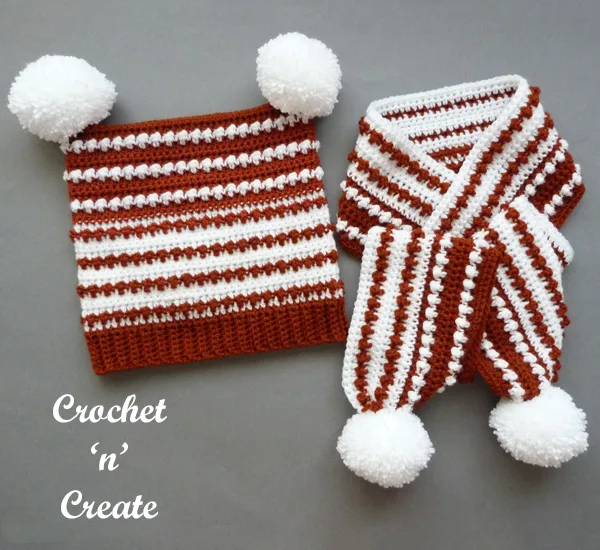
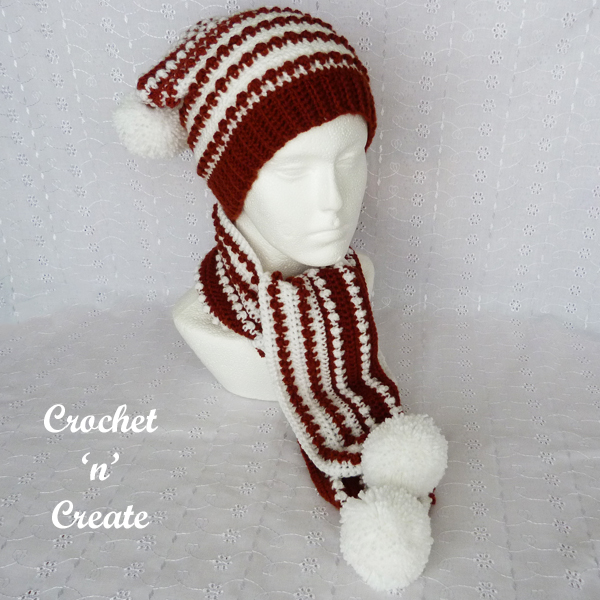
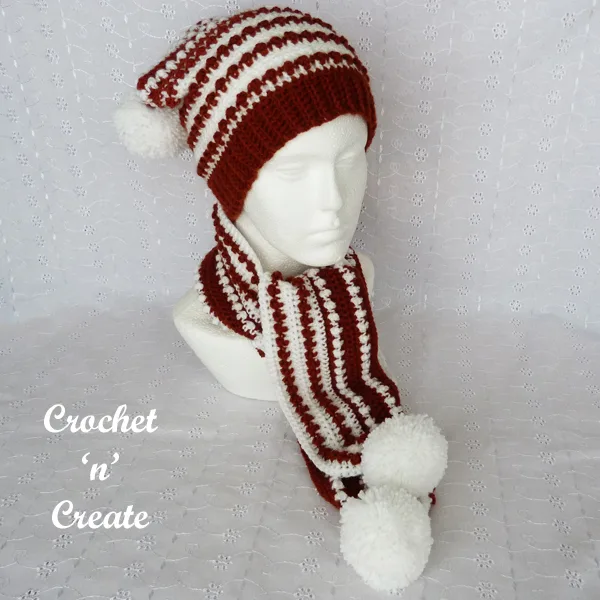
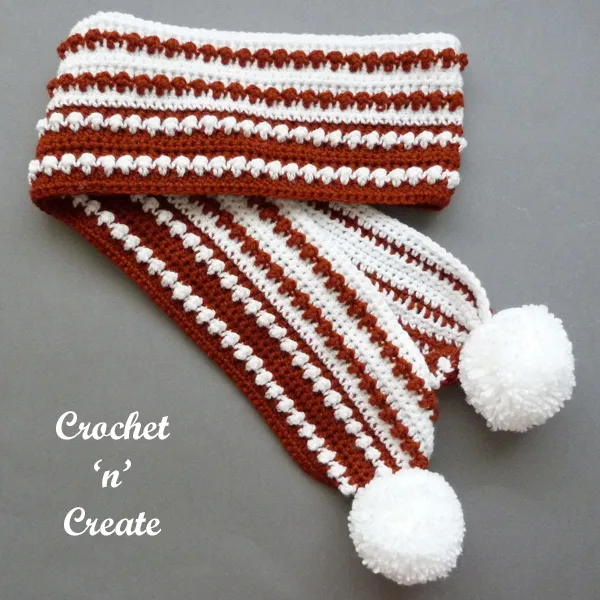
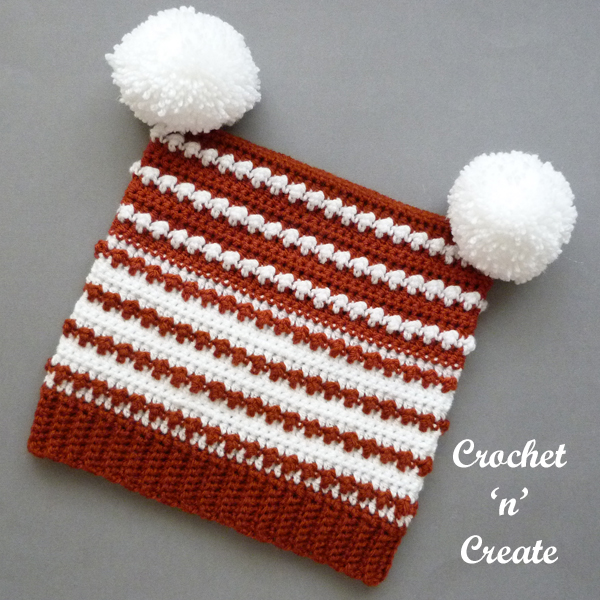
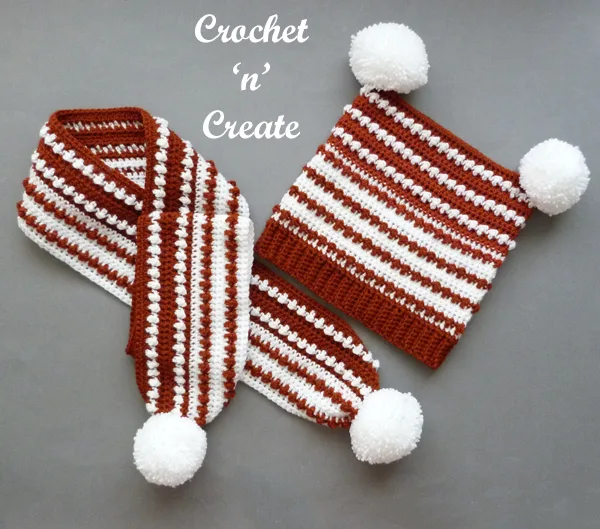
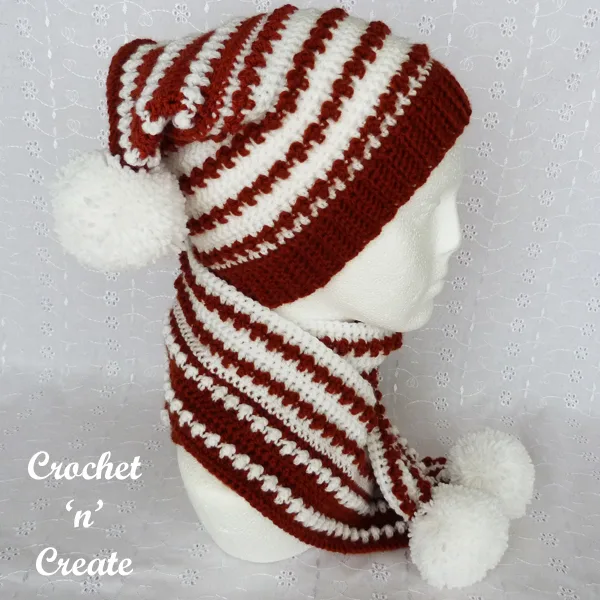
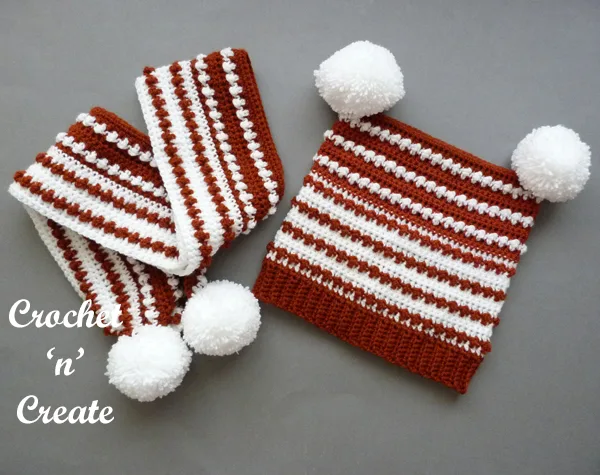
Crochet Rustic Duo Set – Warm yourself up this winter with this lovely duo, consisting of a tea-bag hat and scarf both with pom-poms (optional), crocheted in a light worsted DK #3 yarn and made with a close textured stitch.
Get the free crochet pattern below in UK and USA format.
Disclaimer: This site contains affiliate links. If you make a purchase after clicking on an affiliate link, I may receive a small commission (at no extra expense to you)
* * * *

Follow me on Facebook and Pinterest

* * * *
Scroll down the page for the FREE pattern
* add this pattern to your queue on: Ravelry
* Pin this pattern to your Pinterest Boards
* * * *

SEE MORE FREE CROCHET PATTERNS FOR SCARVES

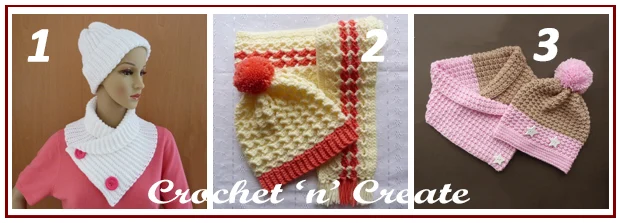
1. Ridged Winter Set / 2. Warm Chunky Hat-Scarf
3. Warm Neopolitan Set

Crochet Rustic Duo Set UK
Pattern Number CNC221
Scroll down the page for the USA format
Abbreviations UK
WS. Wrong Side
RS. Right Side
ch. Chain
dc. Double Crochet
htr. Half Treble Crochet
dtr. Double Treble Crochet
ss. Slip Stitch
rpt. Repeat
DNT. Do Not Turn
BLO. Back Loop Only
Base of ch. Work into first stitch.
Approx Finished Size
Scarf: 4.5 x 50 inches
Hat: 9 Inches in height
Materials
For great results it is always best to use the recommended yarn, I have used approximately:-
100 grams of Stylecraft Special DK yarn in colours 1 & 2
TENSION – 4dc & 3 rows of pattern measures approx 1 inch
**************************************************************
Scarf – With colour 1 make 208ch loosely, 1htr into 2nd ch from hook, (RS) 1htr into each ch to end. Fasten off. (207htr)
2nd Row – Join in colour 2, make 1ch, 1dc into base of 1ch, * 1dtr into next htr, 1dc into next htr, * rpt from * to * to end. Turn. Fasten off. (103dtr)
3rd Row – Join in colour 1, make 1ch, 1htr into base of 1ch, 1htr into each dtr and dc to end. Turn.
4th Row – 1ch, 1dc into base of 1ch, 1dc into each htr to end. Turn.
5th Row – 1ch, 1htr into base of 1ch, 1htr into each dc to end. Turn. Fasten off.
6th Row – Join in colour 2, make 1ch, 1dc into base of 1ch, * 1dtr into next htr, 1dc into next htr, * rpt from * to * to end. Turn. Fasten off.
7th Row – Join in colour 1, make 1ch, 1htr into base of 1ch, 1htr into each dtr and dc to end. Turn. Fasten off.
8th Row – Join in colour 2, make 1ch, 1dc into base of 1ch, 1dc into each htr to end. Turn.
9th Row – 1ch, 1htr into base of 1ch, 1htr into each dc to end. Turn. Fasten off.
10th Row – Join in colour 1, make 1ch, 1dc into base of 1ch, * 1dtr into next htr, 1dc into next htr, * rpt from * to * to end. Turn. Fasten off.
11th Row – Join in colour 2, make 1ch, 1htr into base of 1ch, 1htr into each dtr and dc to end. Turn.
12th Row – 1ch, 1dc into base of 1ch, 1dc into each htr to end. Turn.
13th Row – 1ch, 1htr into base of 1ch, 1htr into each dc to end. Turn. Fasten off.
14th Row – Join in colour 1, make 1ch, 1dc into base of 1ch, * 1dtr into next htr, 1dc into next htr, * rpt from * to * to end. Turn. Fasten off.
15th Row – Join in colour 2, make 1ch, 1htr into base of 1ch, 1htr into each dtr and dc to end. Turn.
16th Row – 1ch, 1dc into base of 1ch, 1dc into each htr to end. Fasten off.
Return to starting chain edge, With colour 1, RS facing and starting with 1ch, 1dc into base of 1ch, work 1dc into each ch to end. Fasten off.
Make 2 medium size pom-pom’s I used Clover pom-pom maker number 65
Finishing – Weave in and trim off all loose ends of yarn, gather each end of scarf and attach a pom-pom.
Hat – With colour 1 make 8ch, 1dc into 2nd ch from hook, 1dc into each ch to end. Turn. (7dc)
Second Row – Working into BLO make 1ch, 1dc into base of 1ch, 1dc into each dc to end. Turn.
Rpt Second Row until you have 78 rows worked in all.
Fold work in half and ss last row worked and starting chain edge together to make a round. DNT.
Place your work so you are working into row ends and the slip stitch seam is facing you.
Starting with 1ch, 1dc into base of 1ch, work 1dc into each row end to end, ss to first dc on beginning of round. Turn. Fasten off. (78dc)
2nd Round – Join colour 2, make 1ch, 1htr into base of 1ch, (RS) 1htr into each dc to end, ss to first htr on beginning of row. Turn. Fasten off.
3rd Round – Join in colour 1, make 1ch, 1dc into base of 1ch, * 1dtr into next htr, 1dc into next htr, * rpt from * to * to end, ss to first dc on beginning of round. Turn. Fasten off. (39dtr)
4th Round – Join in colour 2, make 1ch, 1htr into base of 1ch, 1htr into each dtr and dc to end, ss to first htr on beginning of round. Turn.
5th Round – 1ch, 1dc into base of 1ch, 1dc into each htr to end, ss to first dc on beginning of round. Turn.
6th Round – 1ch, 1htr into base of 1ch, 1htr into each dc to end, ss to first htr on beginning of round. Turn. Fasten off.
Rpt from 3rd to 6th Round twice. Turn. Fasten off.
Work 3rd Round once. Turn. Fasten off.
16th Round – Join in colour 2, make 1ch, 1htr into base of 1ch, 1htr into each dtr and dc to end, ss to first htr on beginning of round. Turn. Fasten off.
17th Round – Join in colour 1 make 1ch, 1dc into base of 1ch, 1dc into htr to end, ss to first dc on beginning of round. Turn.
18th Round – 1ch, 1htr into base of 1ch, 1htr into each dc to end, ss to first htr on beginning of round. Turn. Fasten off.
19th Round – Join in colour 2, make 1ch, 1dc into base of 1ch, * 1dtr into next htr, 1dc into next htr, * rpt from * to * to end, ss to first dc on beginning of round. Turn. Fasten off.
20th Round – Join in colour 1, make 1ch, 1htr into base of 1ch, 1htr into each dtr and dc to end, ss to first htr on beginning of round. Turn.
21st Round – 1ch, 1dc into base of 1ch, 1dc into each htr to end, ss to first dc on beginning of round. Turn.
22nd Round – 1ch, 1htr into base of 1ch, 1htr into each dc to end, ss to first htr on beginning of round. Turn. Fasten off.
Rpt from 19th to 22nd Rounds twice. Fasten off.
Make 2 medium pom-pom’s. I used Clover pom-pom maker number 65.
Finishing – With WS facing weave in and trim off all loose ends of yarn, centre back seam and slip stitch top of hat to close, turn through to RS and attach a pom-pom to each corner.
* * * *
See more free crochet winter set patterns:-
Ridged Set – Warm & Chunky – Neapolitan Twosome
Paris Winter Set – Autumn Scarf Set – Honeycomb Cowl
hope you enjoy all the designs, happy crocheting!
* * * *

Crochet Rustic Duo Set USA
Pattern Number CNC221
Abbreviations USA
WS. Wrong Side
RS. Right Side
st. Stitch(es)
ch. Chain
sc. Single Crochet
hdc. Half Double Crochet
trc. Treble Crochet
sl st. Slip Stitch
rpt. Repeat
DNT. Do Not Turn
BLO. Back Loop Only
Base of ch. Work in first stitch.
Approx Finished Size
Scarf: 4.5 x 50 inches
Hat: 9 Inches in height
Materials
For great results it is always best to use the recommended yarn, I have used approximately:-
100 grams of Stylecraft Special DK yarn in colors 1 & 2
An equivalent yarn would be a light worsted weight #3
GAUGE – 4sc & 3 rows of pattern measures approx 1 inch
**************************************************************
Scarf – With color 1 ch208 loosely, 1hdc in 2nd ch from hook, (RS) 1hdc in each ch to end. Fasten off. (207hdc)
2nd Row – Join in color 2, ch1, 1sc in base of ch1, * 1trc in next hdc, 1sc in next hdc, * rpt from * to * to end. Turn. Fasten off. (103trc)
3rd Row – Join in color 1, ch1, 1hdc in base of ch1, 1hdc in each trc and sc to end. Turn.
4th Row – ch1, 1sc in base of ch1, 1sc in each hdc to end. Turn.
5th Row – ch1, 1hdc in base of ch1, 1hdc in each sc to end. Turn. Fasten off.
6th Row – Join in color 2, ch1, 1sc in base of ch1, * 1trc in next hdc, 1sc in next hdc, * rpt from * to * to end. Turn. Fasten off.
7th Row – Join in color 1, ch1, 1hdc in base of ch1, 1hdc in each trc and sc to end. Turn. Fasten off.
8th Row – Join in color 2, ch1, 1sc in base of ch1, 1sc in each hdc to end. Turn.
9th Row – ch1, 1hdc in base of ch1, 1hdc in each sc to end. Turn. Fasten off.
10th Row – Join in color 1, ch1, 1sc in base of ch1, * 1trc in next hdc, 1sc in next hdc, * rpt from * to * to end. Turn. Fasten off.
11th Row – Join in color 2, ch1, 1hdc in base of ch1, 1hdc in each trc and sc to end. Turn.
12th Row – ch1, 1sc in base of ch1, 1sc in each hdc to end. Turn.
13th Row – ch1, 1hdc in base of ch1, 1hdc in each sc to end. Turn. Fasten off.
14th Row – Join in color 1, ch1, 1sc in base of ch1, * 1trc in next hdc, 1sc in next hdc, * rpt from * to * to end. Turn. Fasten off.
15th Row – Join in color 2, ch1, 1hdc in base of ch1, 1hdc in each trc and sc to end. Turn.
16th Row – ch1, 1sc in base of ch1, 1sc in each hdc to end. Fasten off.
Return to starting chain edge, With color 1, RS facing and starting with ch1, 1sc in base of ch1, work 1sc in each ch to end. Fasten off.
Make 2 medium size pom-pom’s I used Clover pom-pom maker number 65.
Finishing – Weave in and trim off all loose ends of yarn, gather each end of scarf and attach a pom-pom.
Hat – With color 1 ch8, 1sc in 2nd ch from hook, 1sc in each ch to end. Turn. (7sc)
Second Row – Working in BLO ch1, 1sc in base of ch1, 1sc in each sc to end. Turn.
Rpt Second Row until you have 78 rows worked in all.
Fold work in half and sl st last row worked and starting chain edge together to make a round. DNT.
Place your work so you are working in row ends and the slip stitch seam is facing you.
Starting with ch1, 1sc in base of ch1, work 1sc in each row end to end, sl st to first sc on beginning of round. Turn. Fasten off. (78sc)
2nd Round – Join color 2, ch1, 1hdc in base of ch1, (RS) 1hdc in each sc to end, sl st to first hdc on beginning of row. Turn. Fasten off.
3rd Round – Join in color 1, ch1, 1sc in base of ch1, * 1trc in next hdc, 1sc in next hdc, * rpt from * to * to end, sl st to first sc on beginning of round. Turn. Fasten off. (39trc)
4th Round – Join in color 2, ch1, 1hdc in base of ch1, 1hdc in each trc and sc to end, sl st to first hdc on beginning of round. Turn.
5th Round – ch1, 1sc in base of ch1, 1sc in each hdc to end, sl st to first sc on beginning of round. Turn.
6th Round – ch1, 1hdc in base of ch1, 1hdc in each sc to end, sl st to first hdc on beginning of round. Turn. Fasten off.
Rpt from 3rd to 6th Round twice. Turn. Fasten off.
Work 3rd Round once. Turn. Fasten off.
16th Round – Join in color 2, ch1, 1hdc in base of ch1, 1hdc in each trc and sc to end, sl st to first hdc on beginning of round. Turn. Fasten off.
17th Round – Join in color 1 ch1, 1sc in base of ch1, 1sc in hdc to end, sl st to first sc on beginning of round. Turn.
18th Round – ch1, 1hdc in base of ch1, 1hdc in each sc to end, sl st to first hdc on beginning of round. Turn. Fasten off.
19th Round – Join in color 2, ch1, 1sc in base of ch1, * 1trc in next hdc, 1sc in next hdc, * rpt from * to * to end, sl st to first sc on beginning of round. Turn. Fasten off.
20th Round – Join in color 1, ch1, 1hdc in base of ch1, 1hdc in each trc and sc to end, sl st to first hdc on beginning of round. Turn.
21st Round – ch1, 1sc in base of ch1, 1sc in each hdc to end, sl st to first sc on beginning of round. Turn.
22nd Round – ch1, 1hdc in base of ch1, 1hdc in each sc to end, sl st to first hdc on beginning of round. Turn. Fasten off.
Rpt from 19th to 22nd Rounds twice. Fasten off.
Make 2 medium pom-pom’s.
Finishing – With WS facing weave in and trim off all loose ends of yarn, centre back seam and slip stitch top of hat to close, turn through to RS and attach a pom-pom to each corner.
* * * *


All pattern sizing, yarn weights, gauges etc on this website are approx as everybody crochets differently. Every effort is made to ensure this pattern is correct, but I am only human so mistakes may be made, if you find one please let me know by e-mail on crochetncreate@btinternet.com
The written instructions and pictures for this crochet rustic duo set free crochet pattern are copyrighted to crochet ‘n’ create © 2019. You are welcome to sell the finished products made from the crochet rustic duo set free crochet pattern, I just ask that you please use your own pictures and put a link back to crochet ‘n’ create.
If you wish to tell your friends and followers about this pattern, please only use a direct link to the pattern page on crochet ‘n’ create. DO NOT share the written instructions for this crochet rustic duo set free crochet pattern.