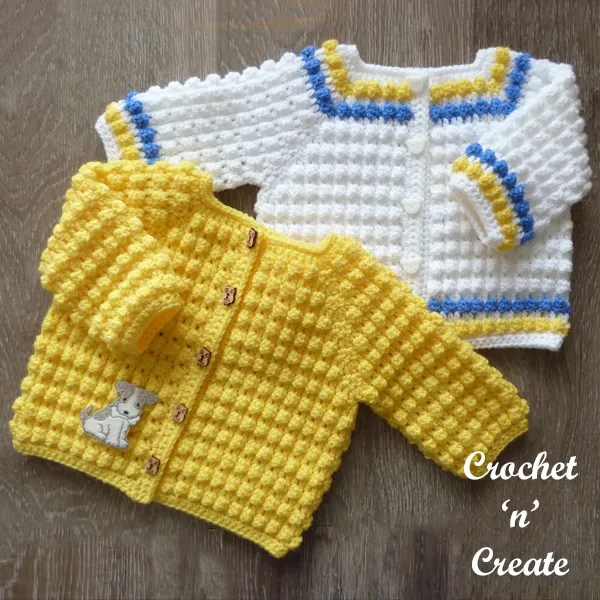
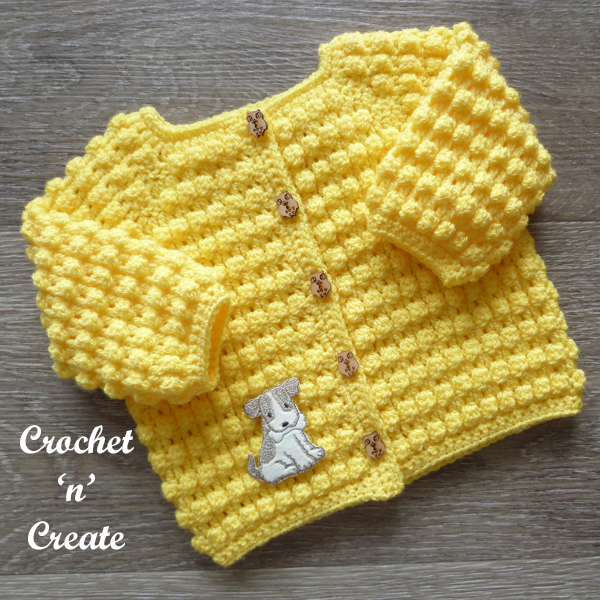
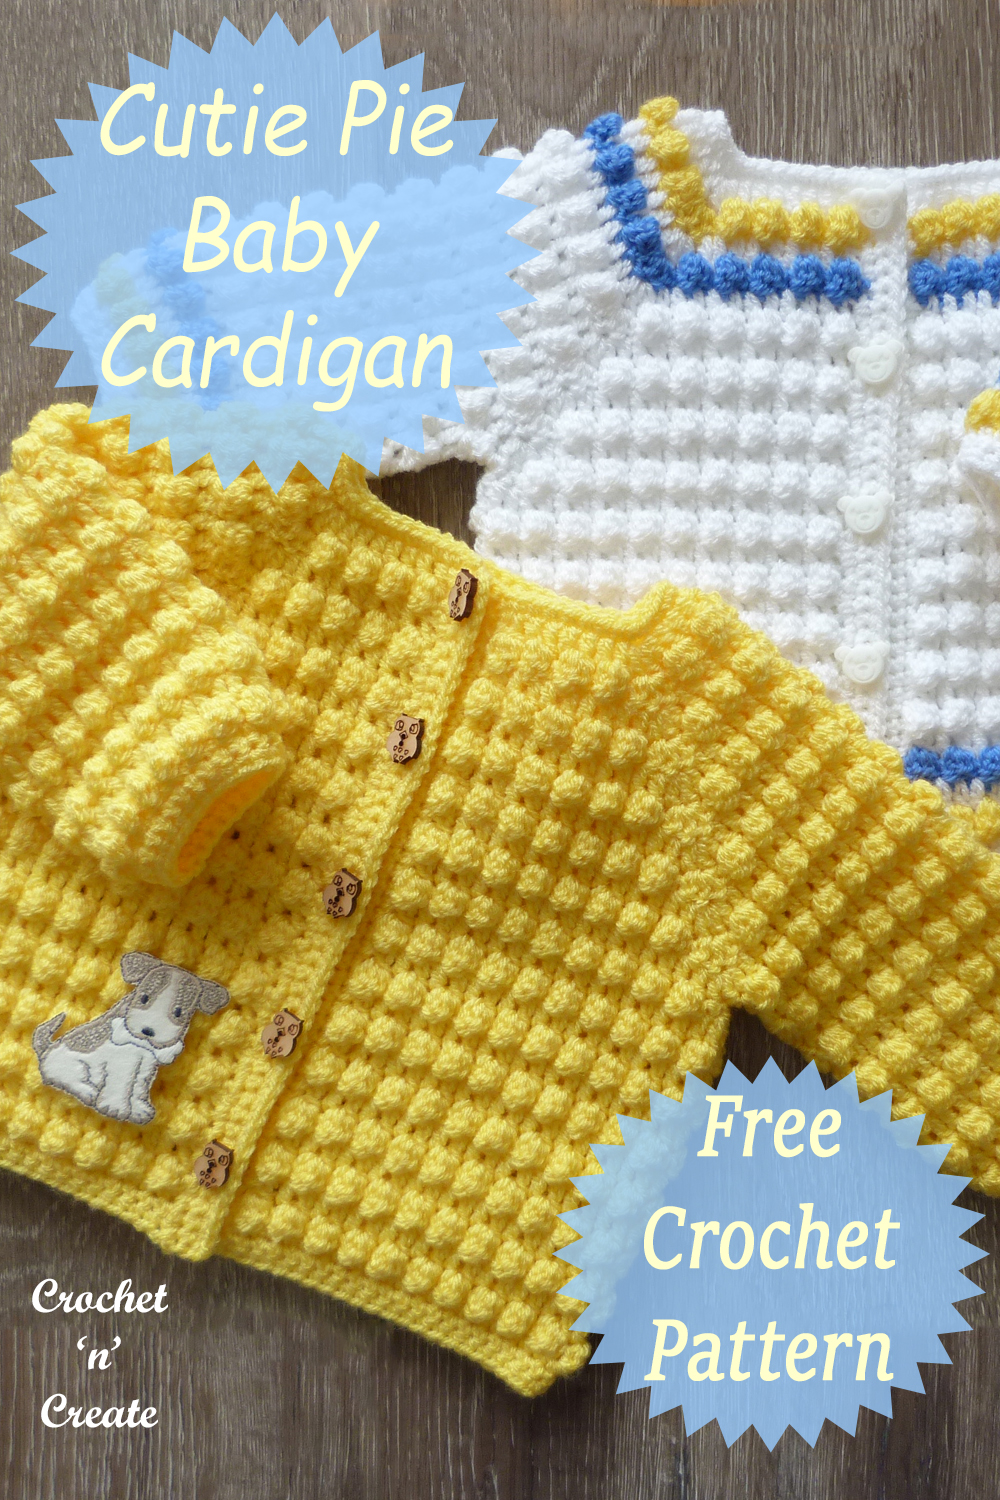
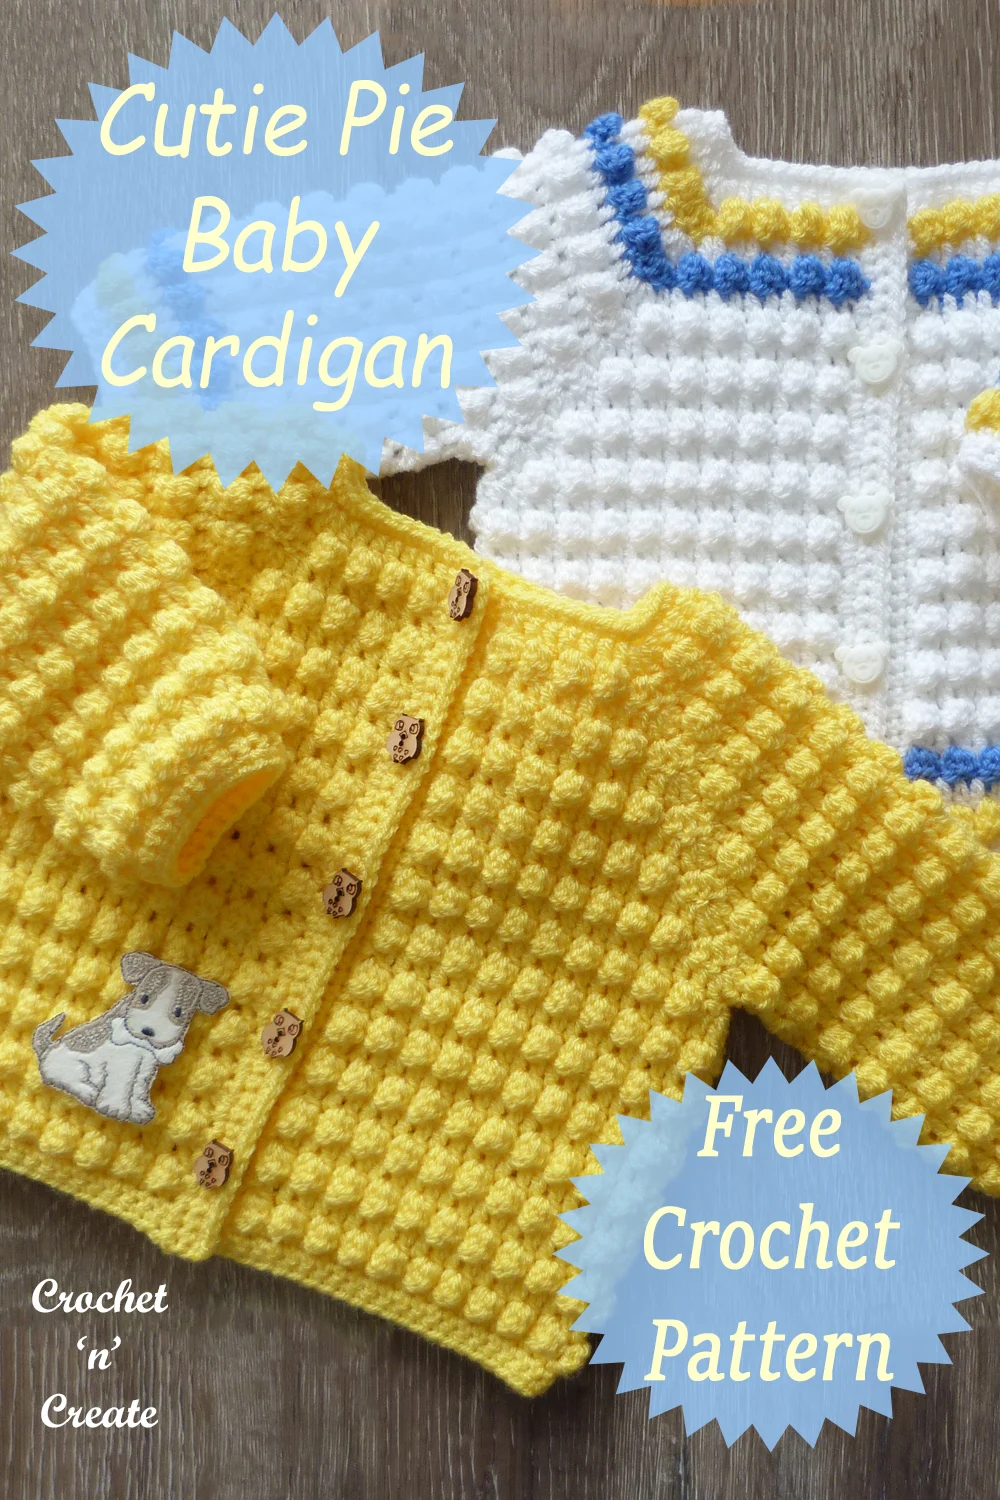
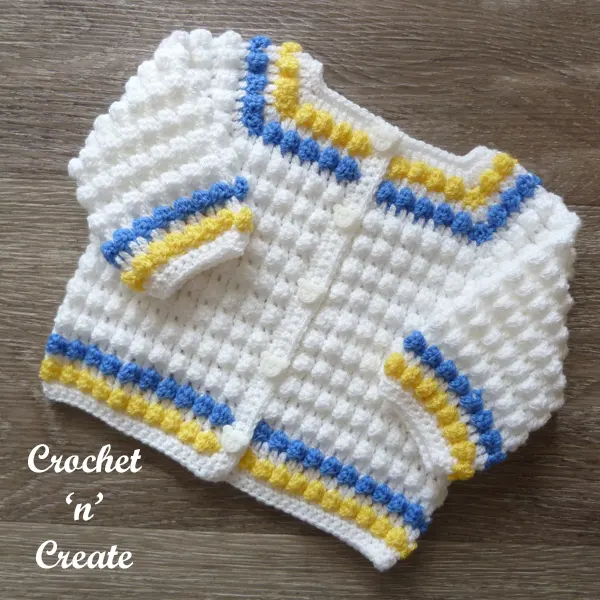
Cutie pie baby cardigan, this adorable free baby crochet cardigan pattern is made from the neck downwards in one piece, so no sewing is involved, it is written in an easy two row repeat design using a light worsted #3 yarn (double knitting for UK) with a 4.00mm crochet hook size.

Disclaimer: This site contains affiliate links. If you make a purchase after clicking on an affiliate link, I may receive a small commission (at no extra expense to you)
See more free Baby Cardigans & Coats patterns:-
- Wattle Preemie Baby Cardigan
- Newborn Baby Cardi
- Ribbed Collar Baby Jacket
- Cotswold Baby Cardigan
- Knobbly Bobbly Baby Cardi
- Woodland Baby Coat

~ I would love to see what you make, tag me on Facebook @crochetncreate ~
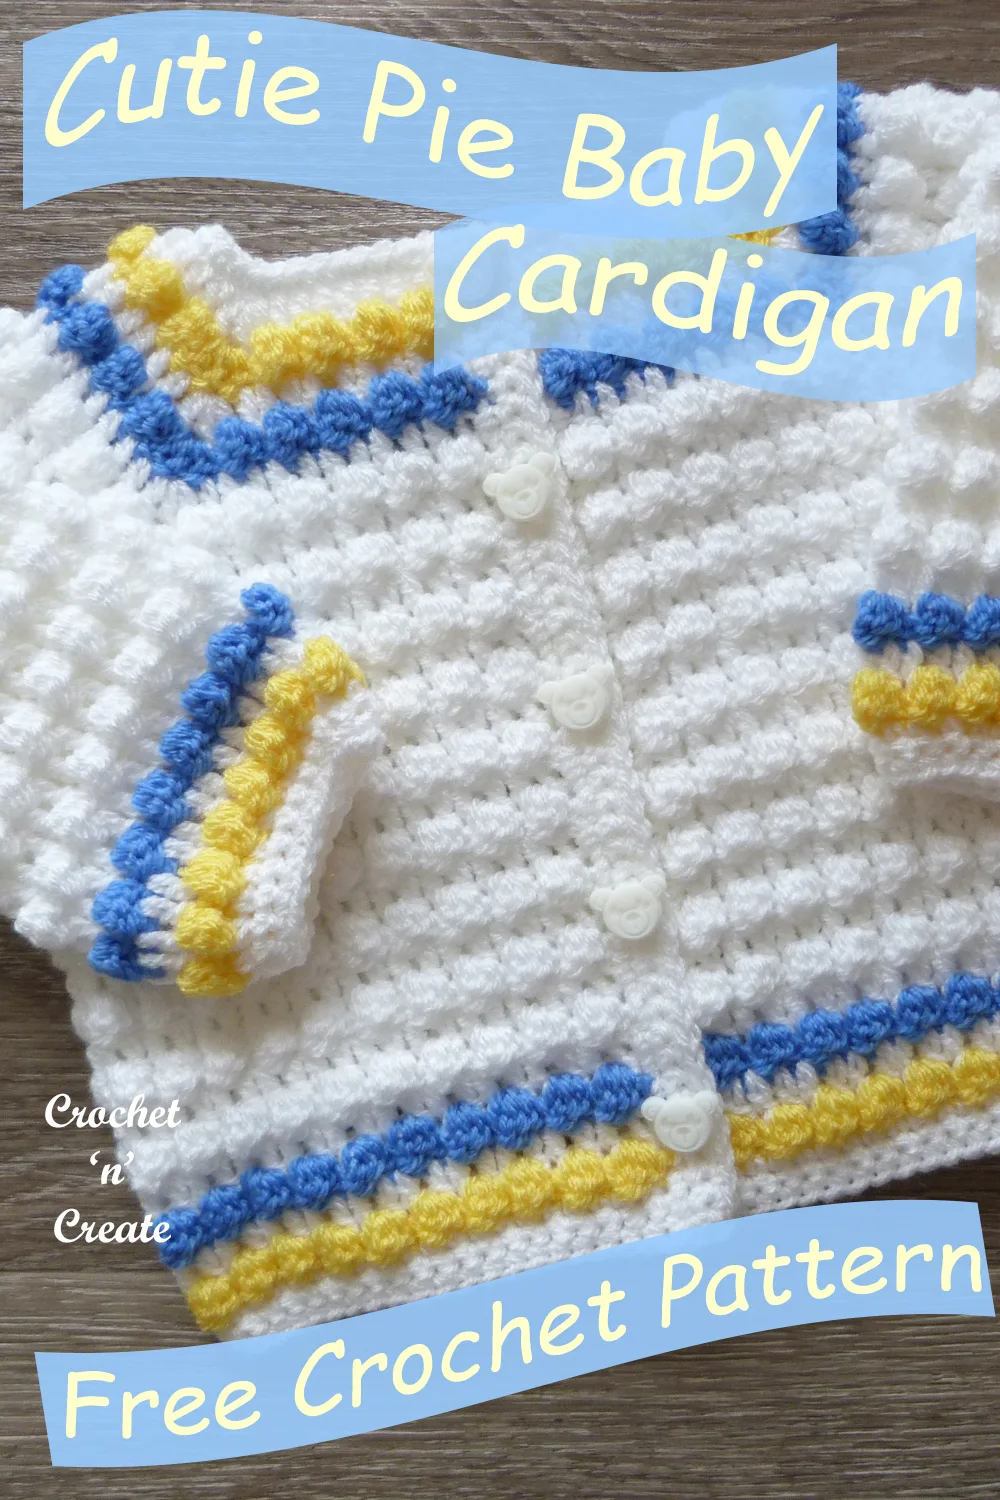
Don’t forget to Pin this crochet cutie pie baby cardigan pattern to your boards to crochet later.
The crochet cutie pie baby cardigan pattern on this page is FREE, just scroll down the page to
get it and then copy and paste the pattern onto a text document to print.
OR
If you prefer you can
~ purchase an (advert free) PDF from: ~
my crochetbabypatterns Shop

Crochet Cutie Pie Baby Cardigan Pattern UK
Pattern Number CNC482
Skill Level: Intermediate
Abbreviations UK
WS. Wrong Side
RS. Right Side
ch. Chain
dc. Double Crochet
tr. Treble Crochet
rpt. Repeat
ss. Slip Stitch
yrh. Yarn Round Hook
DNT. Do Not Turn
tch. Turning Chain
tr3tog. Treble Crochet 3 Together
Leaving last loop of each tr on hook, work 3tr into same space or stitch, yrh and draw through all 4 loops.
tr2tog. Treble Crochet 2 Together
Leaving last loop of each tr on hook, work 2tr into same space or stitch, yrh and draw through all 3 loops.
dec. Decrease
Pull up loop from each of next 2 stitches, yrh, pull through all loops
Base of ch. Work into first stitch
3ch counts as first tr
Size to fit approx: 20 Inch chest, 6 – 12 month baby
Finished length from shoulder approx 11 Inches
Underarm sleeve length approx 5.5 Inches
Materials
For great results it is always best to use the recommended yarn
this pattern has been written in one colour using approx:-
150 grams of Stylecraft Special DK Yarn
You can change to a contrast colour on any of the bobble rows if you wish.
4.00mm crochet hook, 5 Buttons
TENSION – 5tr & 3 rows measures approx 1 inch
*************************
Scroll down the page for the USA format
UK INSTRUCTIONS:
Worked in one piece, starting with yoke.
Make 56ch, 1tr into 4th ch from hook, 1tr into next 6ch, (front), 3tr into next ch, 1tr into next 8ch, (sleeve), 3tr into next ch, 1tr into next 18ch, (back), 3tr into next ch, 1tr into next 8ch, (sleeve), 3tr into next ch, 1tr into next 8ch, (front). Turn (61tr + 3ch)
2nd Row – (Inc) 1ch, 1dc into the stitch at the base of the 1ch, * tr3tog into next tr, 1dc into next tr, *
rpt from * to * to centre tr on 3tr group, (front) 3tr into tr.
rpt from * to * to centre tr on next 3tr group, (sleeve) 3tr into tr.
rpt from * to * to centre tr on next 3tr group, (back) 3tr into tr.
rpt from * to * to centre tr on next 3tr group, (sleeve) 3tr into tr.
1dc into next tr,
rpt from * to * to end, working last dc into top of 3ch. (front)
Turn. (28 tr3tog)
3rd Row – (Inc) 3ch, * 1tr into each stitch to 3tr group, 1tr into next tr, 3tr into centre tr on 3tr group, * rpt from * to * to last 3tr group, 1tr into next tr, 3tr into centre tr on 3tr group, 1tr into each tr to end, 1tr into top of 3ch. Turn. (77tr + 3ch)
Rpt 2nd & 3rd Rows four more times or until 141tr + 3ch remain.
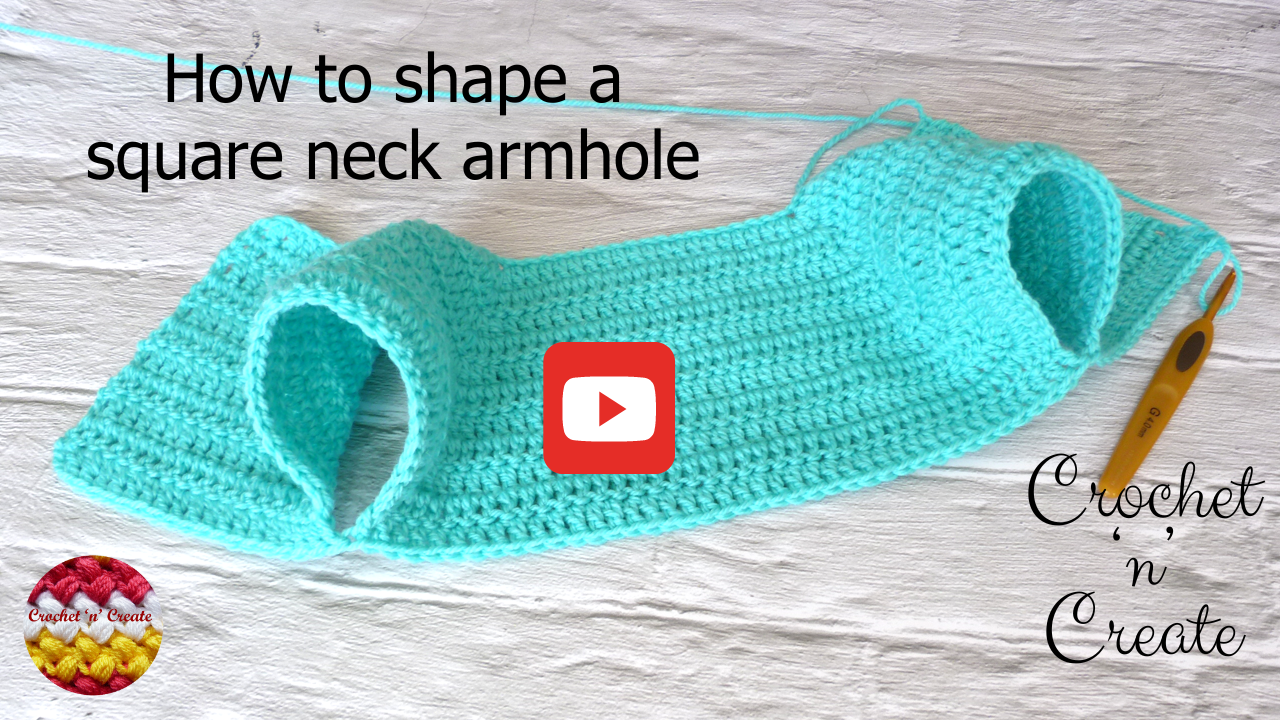
Shape Armholes – 1ch, 1dc into the stitch at the base of the 1ch, * tr3tog into next tr, 1dc into next tr, * rpt from * to * across first front to centre tr on 3tr group, 2dc into tr, miss 30tr, (sleeve) 2dc into next tr, rpt from * to * across back to centre tr on next 3tr group, 2dc into tr, miss 30tr, (sleeve) 1dc into each of next 2tr, rpt from * to * to end. Turn. (38 tr3tog)
Pattern Row 1 – 3ch, 1tr into each stitch to end. Turn. (84tr + 3ch)
Pattern Row 2 – 1ch, 1dc into the stitch at the base of the 1ch, * tr3tog into next tr, 1dc into next tr, * rpt from * to * to end, working last dc into top of 3ch. Turn. (42 tr3tog)
Rpt Pattern Rows 1 & 2 six more times until you have 13 tr3tog rows worked in all from beginning. Turn.
Next Row – 1ch, 1dc into the stitch at the base of the 1ch, 1dc into each stitch to end. Turn.
Rpt last row twice. DNT after the last row.
Button/Buttonhole Bands – With RS of work facing, working along right hand front edge, work 41dc evenly into row ends along first front edge, 3dc into corner, work 1dc into each ch around neck, 3dc into corner, work 41dc evenly into row ends down second front edge. Turn.
Button Band – 1ch, 1dc into the stitch at the base of the 1ch, work 1dc into each dc to corner. Turn.
Rpt last row once. Fasten off.
Buttonhole Band – Return to opposite front edge, with WS facing and working from neck downwards, rejoin yarn to first dc, make 1ch, work 1dc into the stitch at the base of the 1ch, make * 2ch, miss 1dc, 1dc into each of next 8dc, * rpt from * to * 3 more times, 2ch, miss 1dc, 1dc into remaining dc. Turn. (5 Buttonholes made)
Next Row – 1ch, 1dc into the stitch at the base of the 1ch, 1dc into each dc and 2ch space to end. Fasten off.
Sleeves x 2 – With WS facing, rejoin yarn to the first of the 30tr you missed underarm (where you divided for the armholes), work 3ch, tr2tog into the stitch at the base of the 3ch, work 1dc into next tr, * tr3tog into next tr, 1dc into next tr, * rpt from * to * across the 30tr for sleeve to end, miss 3tch, ss to tr2tog on beginning of row to make a round. Turn. (14, tr3tog + tr2tog)
Row 2 – 3ch, 1tr into each stitch to end, ss to top of 3ch on beginning of row. Turn. (29tr + 3ch)
Row 3 – 3ch, tr2tog into the stitch at the base of the 3ch, work 1dc into next tr, * tr3tog into next tr, 1dc into next tr, * rpt from * to * to end, miss 3ch, ss to tr2tog on beginning of row to make a round. Turn.
Rpt Rows 2 & 3 five more times. Turn.
Cuff – 1ch, 1dc into the stitch at the base of the 1ch, 1dc into next 2 stitches, * dec 1dc (see abbrev) over next 2 stitches, 1dc into each of next 3 stitches, * rpt from * to * to last 2 stitches, dec 1dc over stitches, ss to first dc on beginning of row. Turn. (24dc)
Next Row – 1ch, 1dc into the stitch at the base of the 1ch, 1dc into each dc to end, ss to first dc on beginning of row. Turn.
Rpt last row once. Fasten off.
Finishing – Close small gaps under arms, weave in any loose ends of yarn, sew on buttons to correspond with the buttonholes.
USA format below:-
Crochet Cutie Pie Baby Cardigan Pattern USA
Pattern Number CNC482
Skill Level: Intermediate
Abbreviations USA
WS. Wrong Side
RS. Right Side
ch. Chain
sc. Single Crochet
dc. Double Crochet
rpt. Repeat
sl st. Slip Stitch
yo. Yarn Over
DNT. Do Not Turn
tch. Turning Chain
dc3tog. Double Crochet 3 Together
Leaving last loop of each dc on hook, work 3dc in same space or stitch, yo and draw through all 4 loops.
dc2tog. Double Crochet 2 Together
Leaving last loop of each dc on hook, work 2dc in same space or stitch, yo and draw through all 3 loops.
dec. Decrease
Pull up loop from each of next 2 stitches, yo, pull through all loops
Base of ch. Work in first stitch
ch3 counts as first dc
Size to fit approx: 20 Inch chest, 6 – 12 month baby
Finished length from shoulder approx 11 Inches
Underarm sleeve length approx 5.5 Inches
Materials
For great results it is always best to use the recommended yarn
This pattern has been written in one color using approx:-
150 grams of Stylecraft Special DK Yarn
You can change to a contrast color on any of the bobble rows if you wish.
An equivalent yarn would be a light worsted #3
4.00mm crochet hook, 5 Buttons
GAUGE – 5dc & 3 rows measures approx 1 inch
*************************
USA INSTRUCTIONS:
Worked in one piece, starting with yoke.
ch56, 1dc in 4th ch from hook, 1dc in next 6ch, (front), 3dc in next ch, 1dc in next 8ch, (sleeve), 3dc in next ch, 1dc in next 18ch, (back), 3dc in next ch, 1dc in next 8ch, (sleeve), 3dc in next ch, 1dc in next 8ch, (front). Turn (61dc + ch3)
2nd Row – (Inc) ch1, 1sc in the stitch at the base of the ch1, * dc3tog in next dc, 1sc in next dc, *
rpt from * to * to centre dc on 3dc group, (front) 3dc in dc.
rpt from * to * to centre dc on next 3dc group, (sleeve) 3dc in dc.
rpt from * to * to centre dc on next 3dc group, (back) 3dc in dc.
rpt from * to * to centre dc on next 3dc group, (sleeve) 3dc in dc.
1sc in next dc,
rpt from * to * to end, working last sc in top of ch3. (front)
Turn. (28 dc3tog)
3rd Row – (Inc) ch3, * 1dc in each stitch to 3dc group, 1dc in next dc, 3dc in centre dc on 3dc group, * rpt from * to * to last 3dc group, 1dc in next dc, 3dc in centre dc on 3dc group, 1dc in each dc to end, 1dc in top of ch3. Turn. (77dc + ch3)
Rpt 2nd & 3rd Rows four more times or until 141dc + ch3 remain.
Shape Armholes – ch1, 1sc in the stitch at the base of the ch1, * dc3tog in next dc, 1sc in next dc, * rpt from * to * across first front to centre dc on 3dc group, 2sc in dc, skip 30dc, (sleeve) 2sc in next dc, rpt from * to * across back to centre dc on next 3dc group, 2sc in dc, skip 30dc, (sleeve) 1sc in each of next 2dc, rpt from * to * to end. Turn. (38 dc3tog)
Pattern Row 1 – ch3, 1dc in each stitch to end. Turn. (84dc + ch3)
Pattern Row 2 – ch1, 1sc in the stitch at the base of the ch1, * dc3tog in next dc, 1sc in next dc, * rpt from * to * to end, working last sc in top of ch3. Turn. (42 dc3tog)
Rpt Pattern Rows 1 & 2 six more times until you have 13 dc3tog rows worked in all from beginning. Turn.
Next Row – ch1, 1sc in the stitch at the base of the ch1, 1sc in each stitch to end. Turn.
Rpt last row twice. DNT after the last row.
Button/Buttonhole Bands – With RS of work facing, working along right hand front edge, work 41sc evenly in row ends along first front edge, 3sc in corner, work 1sc in each ch around neck, 3sc in corner, work 41sc evenly in row ends down second front edge. Turn.
Button Band – ch1, 1sc in stitch at the base of the ch1, work 1sc in each sc to corner. Turn.
Rpt last row once. Fasten off.
Buttonhole Band – Return to opposite front edge, with WS facing and working from neck downwards, rejoin yarn to first sc, ch1, work 1sc in the stitch at the base of the ch1, * ch2, skip 1sc, 1sc in each of next 8sc, * rpt from * to * 3 more times, ch2, skip 1sc, 1sc in remaining sc. Turn. (5 Buttonholes made)
Next Row – ch1, 1sc in the stitch at the base of the ch1, 1sc in each sc and ch2 space to end. Fasten off.
Sleeves x 2 – With WS facing, rejoin yarn to the first of the 30dc you skipped underarm (where you divided for the armholes), ch3, dc2tog in the stitch at the base of the ch3, work 1sc in next dc, * dc3tog in next dc, 1sc in next dc, * rpt from * to * across the 30dc for sleeve to end, skip 3tch, sl st to dc2tog on beginning of row to make a round. Turn. (14, dc3tog + dc2tog)
Row 2 – ch3, 1dc in each stitch to end, sl st to top of ch3 on beginning of row. Turn. (29dc + ch3)
Row 3 – ch3, dc2tog in the stitch at the base of the ch3, work 1sc in next dc, * dc3tog in next dc, 1sc in next dc, * rpt from * to * to end, skip ch3, sl st to dc2tog on beginning of row to make a round. Turn.
Rpt Rows 2 & 3 five more times. Turn.
Cuff – ch1, 1sc in the stitch at the base of ch1, 1sc in next 2 stitches, * dec 1sc (see abbrev) over next 2 stitches, 1sc in each of next 3 stitches, * rpt from * to * to last 2 stitches, dec 1sc over stitches, sl st to first sc on beginning of row. Turn. (24sc)
Next Row – ch1, 1sc in the stitch at the base of ch1, 1sc in each sc to end, sl st to first sc on beginning of row. Turn.
Rpt last row once. Fasten off.
Finishing – Close the small gaps under arms, weave in any loose ends of yarn, sew on the buttons to correspond with the buttonholes.
Pin it!

All pattern sizing, yarn weights, gauges etc on this website are approx as everybody crochets differently. Every effort is made to ensure the free crochet patterns are correct, but I am only human so mistakes may be made, if you find one please let me know by e-mail on crochetncreate@btinternet.com
The written instructions and pictures for this free cutie pie baby cardigan crochet pattern are copyrighted to crochet ‘n’ create © 2023. You are welcome to sell the finished products made from the free cutie pie baby cardigan crochet pattern, I just ask that you please use your own pictures and put a link back to crochet ‘n’ create.
If you wish to tell your friends and followers about this pattern, please only use a direct link to the pattern page on crochet ‘n’ create. DO NOT share the written instructions for this free cutie pie baby cardigan crochet pattern.