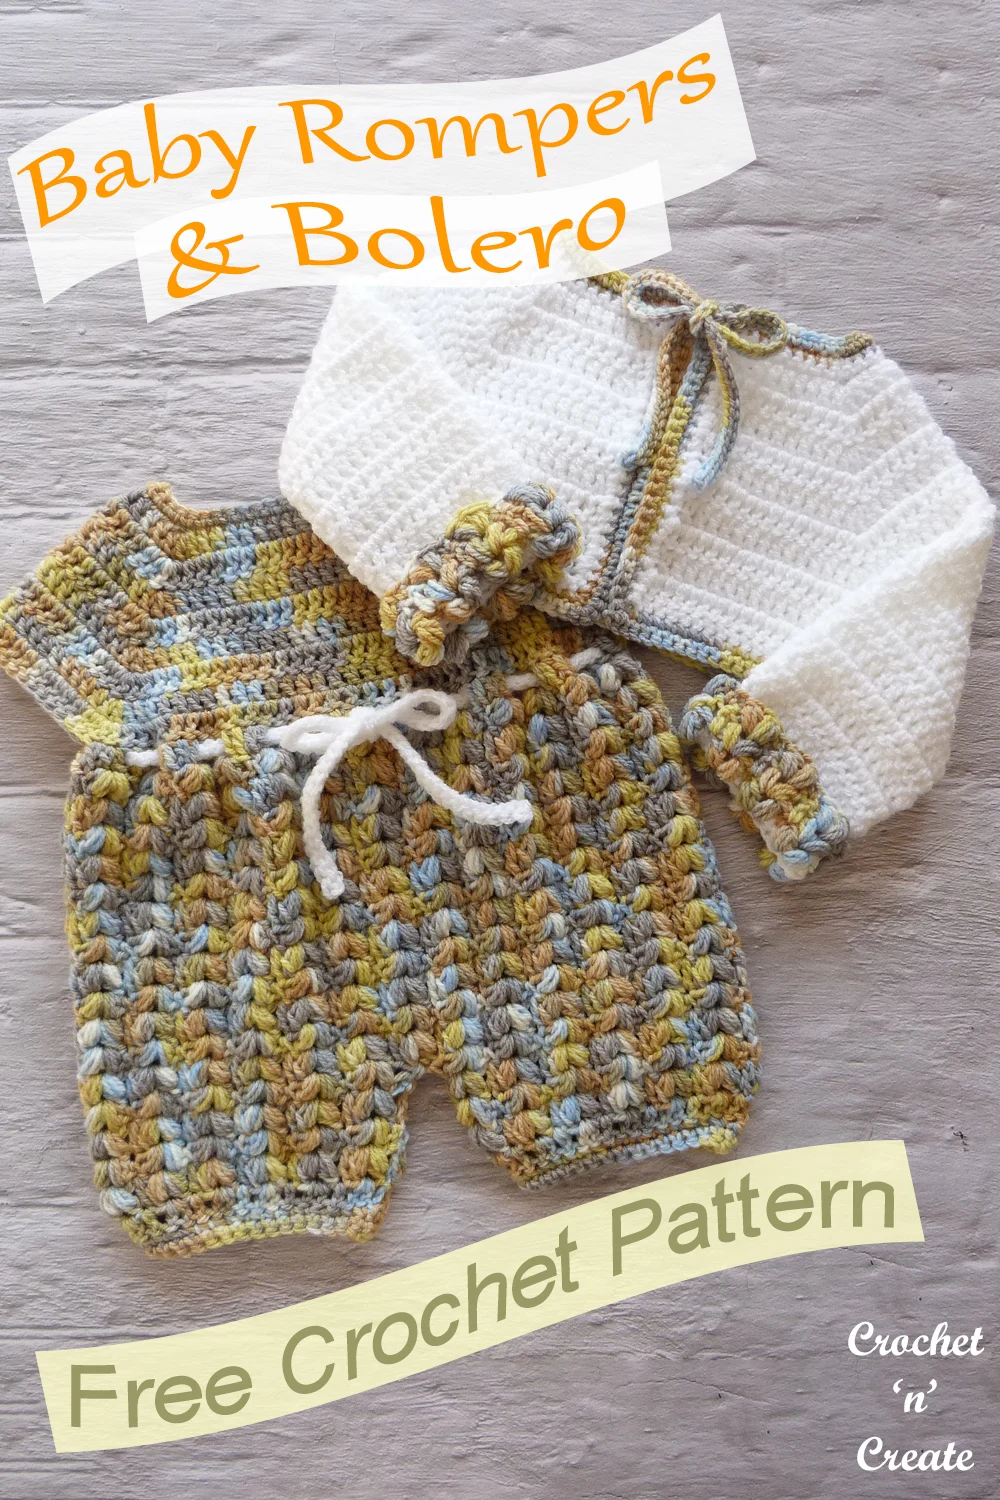
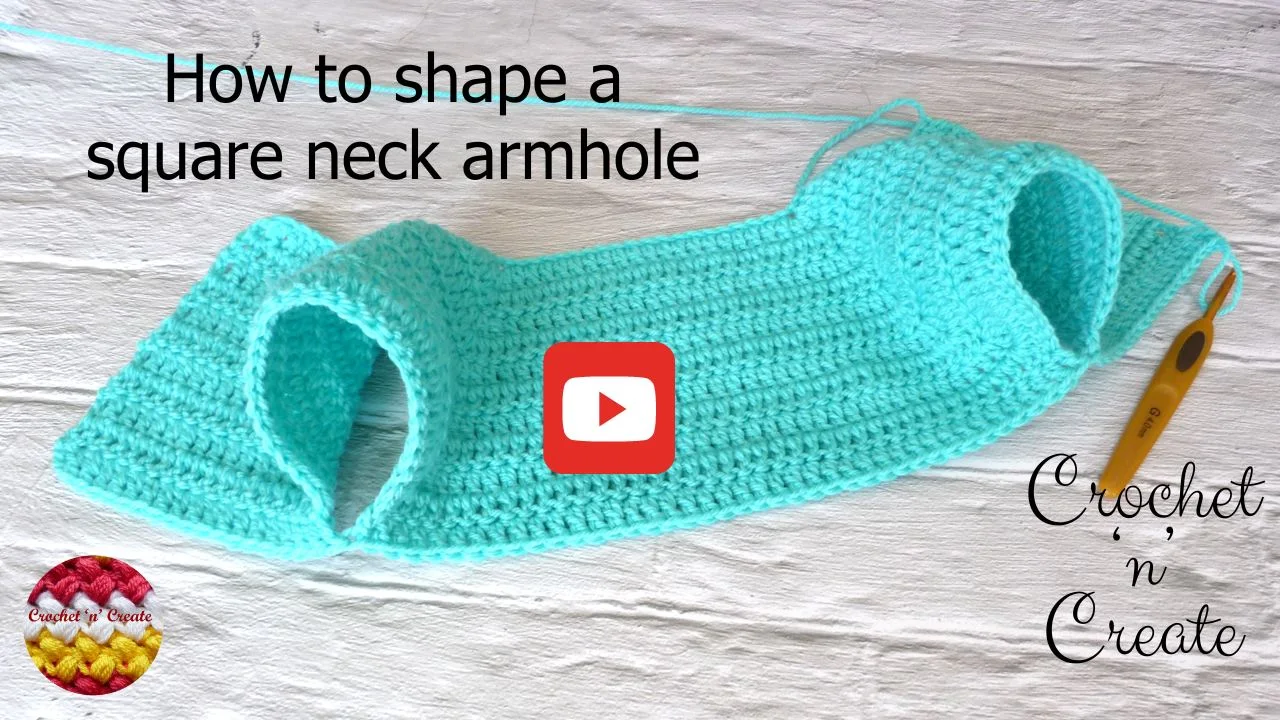
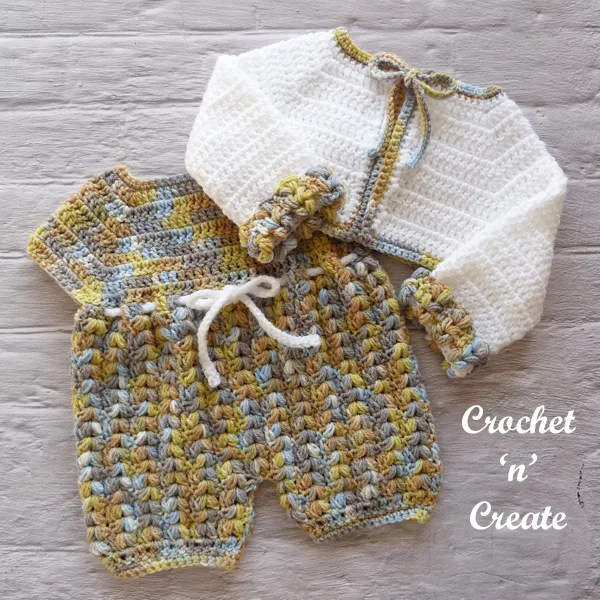
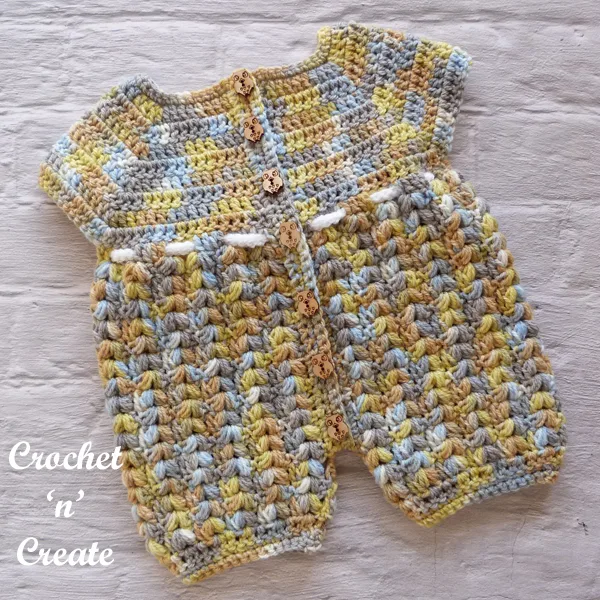
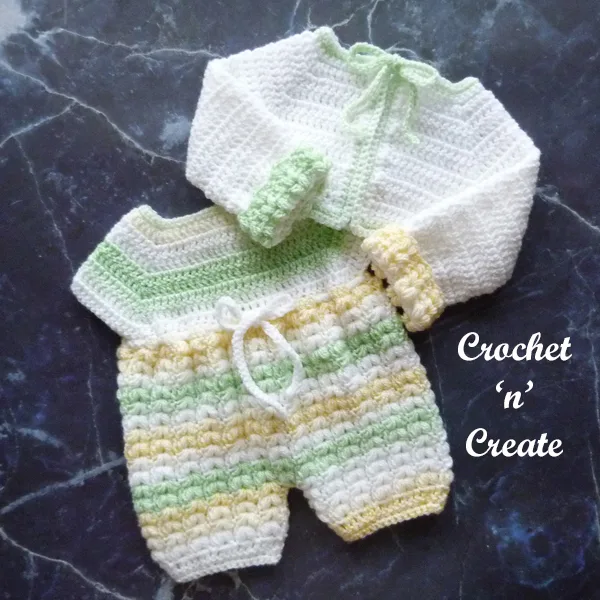
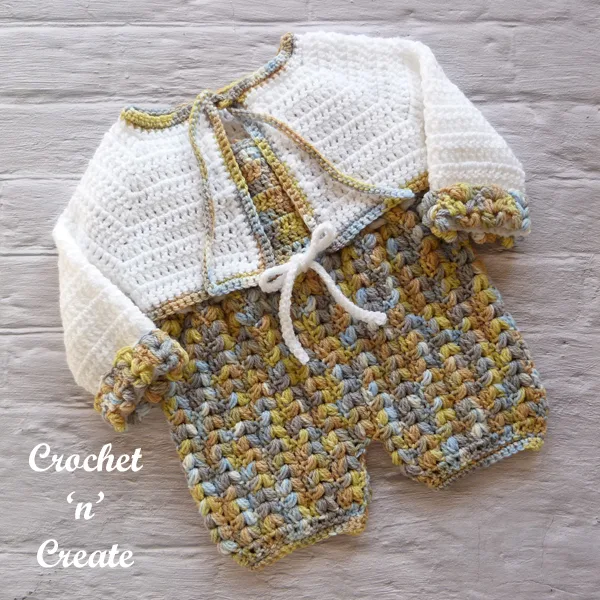
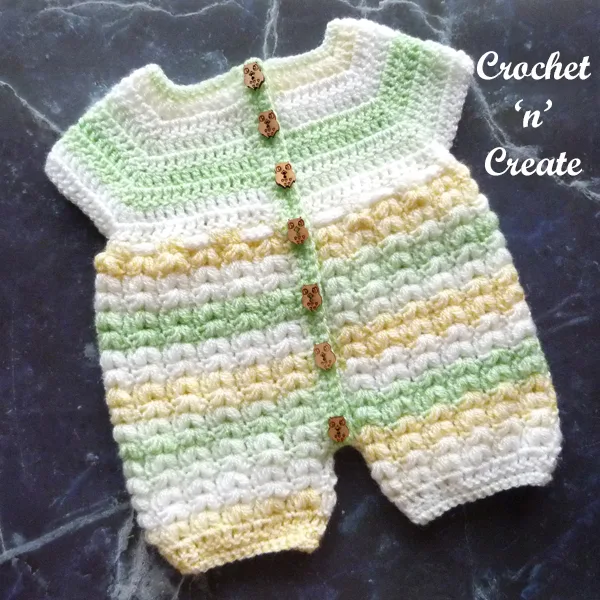
Crochet baby rompers-bolero, the perfect twosome for any new arrival, it will be great for baby shower gifts, crocheted in a puff stitch v design it consists of a romper suit and matching bolero cardigan.
You can change the size of the crochet baby rompers-bolero outfit by using a smaller or larger hook if you wish.
To avoid any sewing up, the pattern is worked from the neck downwards, the romper back is open all the way down for easy changing, closes with seven buttons, I have used a light worsted (double knitting for UK) in a multi coloured yarn for the rompers and a solid colour for the bolero with multi coloured cuffs.
Disclaimer
This site contains affiliate links. If you make a purchase after clicking on an affiliate link, I may receive a small commission (at no extra expense to you)
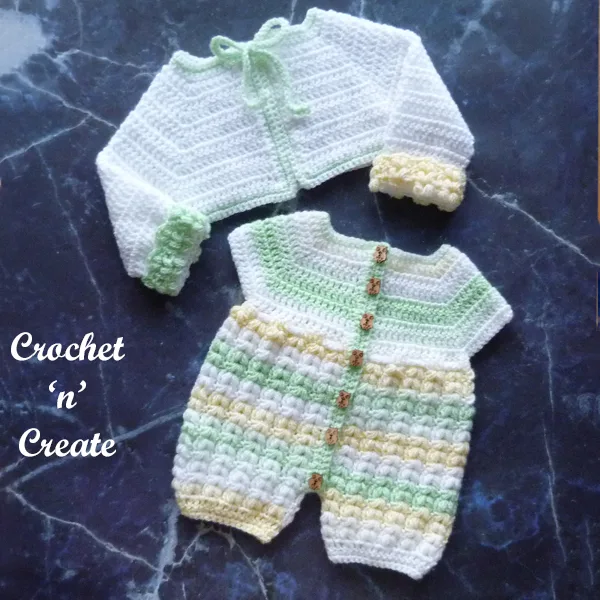
See more free crochet babies & children patterns:-
- Preemie Coat & Hat
- Newborn Dress Set
- Winter Berry Set
- Smarty Pants
- Premature Baby Outfit
- Three Piece Set
Formats
Two easy formats have been used to write this beautiful crochet baby rompers-bolero pattern for UK crocheters and USA crafters.
Abbreviations UK & USA
RS. Right Side
ch. Chain
dc. Double Crochet – sc
tr. Treble Crochet – dc
rpt. Repeat
ss. Slip Stitch – sl st
DNT. Do Not Turn
yrh. Yarn Round Hook – yo
BLO. Back Loop Only
Best Yarn
For great results it is always best to use the recommended yarn in the pattern materials section.
I have used King Cole Comfort Kids double knitting in two colours for the crochet baby rompers-bolero outfit, but other colours can be used.
Crochet Hook Size
Pattern asks for a 4.00mm crochet hook for both pieces, you are welcome to use other hook sizes and thicker yarn if you want to make the outfit a different size.
~ purchase an (advert free) PDF of this
crochet baby rompers-bolero pattern from: ~
my crochetbabypatterns Shop
Copyrights
The written instructions and pictures for this free crochet baby rompers-bolero pattern are the sole property of crochetncreate. The pattern is copyright protected © 2024 and cannot be copied or reproduced in any way. You are welcome to sell your finished items made from this pattern, I require a mention or a link back to this pattern. My photos are copyright protected and are not to be used to sell your items.
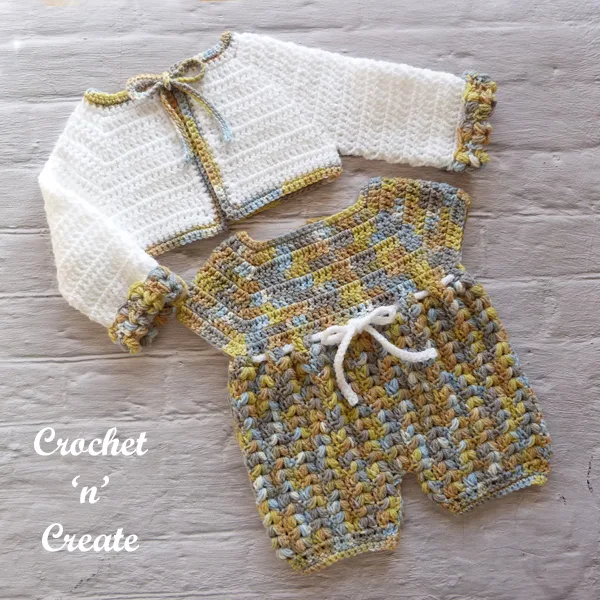
Crochet Baby Rompers-Bolero UK
Pattern Number CNC491
Skill Level: Intermediate
Abbreviations UK
RS. Right Side
ch. Chain
dc. Double Crochet
tr. Treble Crochet
rpt. Repeat
ss. Slip Stitch
DNT. Do Not Turn
yrh. Yarn Round Hook
BLO. Back Loop Only
Dec. Decrease
Pull up loop from next 2 stitches, yrh and pull through all loops
PS. Puff Stitch
yrh insert into st, pull up loop, (three times) yrh draw through 6 loops on hook, yrh draw through 2 loops on hook
ps group (1ps, 1ch, 1ps) into same space or stitch.
Base of ch. Work into first stitch
3ch counts as first tr
Size to fit: 18 inch chest 3-6 month baby
Sleeve length 5 inches (not including turned back cuff)
Materials
For great results it is always best to use the recommended yarn, I have used approximately:-
150 grams of King Cole Comfort Kids DK yarn in colour 1
100 grams of King Cole Baby Comfort DK yarn in colour 2
4.00mm crochet hook, to make for a 0-3 month or 6-12 month baby use a smaller or larger hook size
7 small buttons
TENSION – 4tr and 2.5 rows measures approx 1 Inch
*********************************************
Scroll down the page for the USA format
UK INSTRUCTIONS:
Rompers – # (Worked in one piece, starting with yoke)
Using colour 1 make 55ch, (RS) 1tr into 4th ch from hook, 1tr into the next 6ch’s (Back), 3tr into next ch, 1tr into next 8ch’s (shoulder), 3tr into next ch, 1tr into the next 17ch’s (Front), 3tr into next ch, 1tr into the next 8ch’s. (shoulder), 3tr into next ch, 1tr into the next 8ch’s (Back). Turn. (60tr + 3ch)
2nd Row – (Inc Row) 3ch, * 1tr into each tr to next 3tr group, 1tr into next tr, 3tr into centre tr of 3tr group, * rpt from * to * to last 3tr group, 1tr into next tr, 3tr into centre tr of 3tr group, 1tr into each tr to end, work 1tr into top of 3ch. Turn. (68tr + 3ch)
3rd to 8th Row – rpt 2nd Row. Turn. (116tr + 3ch) #
9th Row – (Inc & Divide for Armholes) – Make 3ch, 1tr in next tr, * 2tr into next tr, 1tr into next tr,* rpt from * to * to centre tr of the first 3tr group, 2tr into centre tr, miss next 24tr, (armhole) 1tr into centre tr of next 3tr group, rpt from * to * to centre tr of next 3tr group, miss next 24tr, (armhole) rpt from * to * to end, work 1tr into top of 3ch, Turn. (101tr + 3ch)
Commence Body – Make 1ch, 1dc into base of 1ch, * miss 1tr, (1ps, 1ch, 1ps) into next tr, miss 1tr, 1dc into next tr, * rpt from * to * to last 4tr and 3ch, miss 1tr, (1ps, 1ch, 1ps) into next dc, miss 1dc, dec 1dc (see abbrev) over last tr and 3ch. Turn. (25ps, groups) [see abbrev for ps stitch]
Pattern Row 1 – 3ch, * (1ps, 1ch, 1ps) into 1ch space of next ps group, 1tr into dc, * rpt from * to * to end. Turn.
Pattern Row 2 – 1ch, 1dc into base of 1ch, * (1ps, 1ch, 1ps) into 1ch space of next ps group, 1dc into tr, * rpt from * to * to end, working last dc into top of 3ch. Turn.
Rpt Pattern Rows 1 & 2 until 11ps rows have been worked from yoke or work measures approx 9.5 Inches from shoulder.
Work Pattern Row 1. Turn.
Divide for Legs
First Leg – Work Pattern Row 2 across 12, ps groups, miss tr, 1dc into 1ch space of next ps group, ss to first dc on beginning of row to make a round. Turn leaving remaining stitches un-worked (will come back to for second leg). (12ps groups)
Second Row – 3ch, miss 1dc, work * (1ps, 1ch, 1ps) into 1ch space of next ps group, 1tr into dc, * rpt from * to * to last ps group, work (1ps, 1ch, 1ps) into the 1ch space on group, ss to top of 3ch on beginning of row. Turn.
Third Row – 1ch, 1dc into base of 1ch, * (1ps, 1ch, 1ps) into 1ch space of next ps group, 1dc into tr, * rpt from * to * to last ps group, work (1ps, 1ch, 1ps) into last ps group, ss to first dc on beginning of row. Turn.
Fourth Row – 3ch, * (1ps, 1ch, 1ps) into 1ch space of next ps group, 1tr into dc, * rpt from * to * to last ps group, work (1ps, 1ch, 1ps) into last ps group, ss to top of 3ch on beginning of row. Turn.
Leg measures approx 2 Inches. (you can adjust leg length here if you wish, by working more or less rows)
Fifth Row – 3ch, * 2tr into next 1ch space, 1tr into tr, * rpt from * to * to last 1ch space, 2tr into 1ch space, ss to top of 3ch on beginning of row. Turn. (35tr + 3ch)
Sixth Row – (Dec) 1ch, 1dc into base of 1ch, 1dc into each of next 6tr, * dec 1dc over next 2tr, (see abbrev) 1dc into each of next 7tr, * rpt from * to * to last 2tr, dec 1dc over last 2tr, ss to first dc on beginning of row. (32dc)
Seventh Row – 1ch, 1dc into base of 1ch, 1dc into each dc to end, ss to first dc on beginning of row. Fasten off.
Second Leg – Return to un-worked stitches at division and rejoin yarn to same ps group as first leg, 1ch, 1dc into same space, miss 1tr, * (1ps, 1ch, 1ps) into 1ch space of next ps group, 1dc into tr, * rpt from * to * to end, working last dc into top of 3ch, ss to first dc on beginning of row to make the round. Turn. (12ps groups)
Continue second leg same as the first leg, starting from Second Row. Fasten off
Button/Buttonhole Bands – (Instructions are given for a girl, swap sides for a boy)
With WS facing rejoin yarn to left hand side of back edge, (top of leg) make 1ch, 1dc into base of 1ch, work 37 more dc evenly into row ends to neck edge, 3dc into corner, 1dc into each of the starting ch around neck, 3dc into corner, 38dc evenly into row ends down second back edge. Turn.
Buttonhole Row – 1ch, 1dc into base of 1ch, 1dc into next dc, * make 2ch, miss 1dc, 1dc into each of next 5dc, * rpt from * to * 5 more times, make 2ch, miss 1dc, 1dc into next dc. Turn. (7 buttonholes made)
Next Row – 1ch, 1dc into base of 1ch, 1dc into each 2ch space and dc to end. Fasten off.
Return to first back edge, with RS facing and starting from corner, work from neck downwards, make 1ch, work 1dc into base of 1ch, 1dc into each dc to end. Turn.
Starting with 1ch, 1dc into base of 1ch work 1 more row in dc. Fasten off.
Chain Tie x 2 – Using colour 2, make 75ch, ss into 2nd ch from hook and each ch along. Fasten off.
Finishing – Weave in any loose ends of yarn, attach buttons to correspond with buttonholes, working from back round to the front and securing chain ends to WS of body suit, thread chain ties through alternate tr’s under armholes and make a bow.
Bolero – Using colour 2 rpt from # to # on bodysuit.
9th Row – rpt 2nd Row on bodysuit. Turn. (124tr + 3ch)
10th Row – (Divide for Armholes) – Make 3ch, 1tr into each tr to centre tr of the first 3tr group, 2tr into centre tr, miss next 26tr, (armhole) 2tr into centre tr of next 3tr group, 1tr into each tr to centre tr of next 3tr group, 2tr into tr, miss next 26tr, (armhole) 2tr into next tr, 1tr into each tr to end, 1tr into top of 3ch, Turn. DNT. (76tr + 3ch)
Button/Buttonhole Bands – Working along first front edge, make 1ch, 1dc into the stitch at the base of the 1ch, work 19dc evenly into row ends to neck edge, 3dc into corner, 1dc into each of the starting ch around neck to next neck edge, 3dc into corner, work 20dc evenly into row ends down second front edge, 3dc into corner, work 1dc into each tr along the bottom of the bolero, 1dc into corner, ss to first dc on beginning of row. Turn. Fasten off.
Neck Ties Row – With colour 1 make 1ch, 1dc into base of 1ch, work 1dc into each dc along bottom of bolero, 3dc into corner, 1dc into each dc up first front edge to neck, 1dc into corner, make 41ch, ss into 2nd ch from hook and each ch to end, 2dc into corner, 1dc into each dc around neck to next neck edge, 2dc into corner, make 41ch, ss into 2nd ch from hook and each ch to end, 1dc into corner, 1dc into each dc down second front, ss to first dc on beginning of row. Turn.
Starting with 1ch, 1dc into base of 1ch, work one more row of 1dc into each dc to end, working 3dc into corners. Fasten off.
Sleeve x 2 – With colour 2 and WS facing, join yarn to the side of the tr under arm, make 3ch, work 1tr into each of the next 26tr, 1tr into side of tr on the opposite side of armhole, ss to top of 3ch on the beginning of row. Turn. (27tr + 3ch)
Next Row – 3ch, 1tr into each tr across, ss to top of 3ch on beginning of row. Turn.
Rpt last row until 12 rows have been worked from yoke or under arm sleeve seem measures approx 5 inches. Fasten off.
Cuff – Working into BLO for this row, join in colour 1, make 1ch, work 1dc into the stitch at the base of the 1ch, miss 1tr, work (1ps, 1ch, 1ps) into next tr, miss 1tr, * 1dc into next tr, (1ps, 1ch, 1ps) into next tr, * rpt * to * to last tr, miss tr, ss to dc on beginning of row. Turn. (7ps groups)
Rpt Fourth Row from legs on rompers.
Rpt Third Row from legs on rompers. Fasten off.
Finishing – Weave in and tie off any loose ends, turn back cuffs onto sleeves, tie neck ties into a bow.
USA format below:-

Crochet Baby Rompers-Bolero USA
Pattern Number CNC491
Skill Level: Intermediate
Abbreviations USA
RS. Right Side
ch. Chain
sc. Single Crochet
dc. Double Crochet
rpt. Repeat
sl st. Slip Stitch
DNT. Do Not Turn
yo. Yarn Over Hook
BLO. Back Loop Only
Dec. Decrease
Pull up loop from next 2 stitches, yo and pull through all loops
ps. Puff Stitch
yo insert in st, pull up loop, (three times) yo draw through 6 loops on hook, yo draw through 2 loops on hook
ps group (1ps, ch1, 1ps) in same space or stitch.
Base of ch. Work in first stitch
ch3 counts as first dc
Size to fit: 18 inch chest 3-6 month baby
Sleeve length 5 inches (not including turned back cuff)
Materials
For great results it is always best to use the recommended yarn, I have used approximately:-
150 grams of King Cole Comfort Kids DK yarn in color 1
100 grams of King Cole Baby Comfort DK yarn in color 2
An equivalent yarn would be a light worsted #3
4.00mm crochet hook, to make for a 0-3 month or 6-12 month baby use a smaller or larger hook size
7 small buttons
GAUGE – 4dc and 2.5 rows measures approx 1 Inch
********************************************
USA INSTRUCTIONS:
Rompers – # (Worked in one piece, starting with yoke)
Using color 1 ch55, (RS) 1dc in 4th ch from hook, 1dc in the next 6ch’s (Back), 3dc in next ch, 1dc in next 8ch’s (shoulder), 3dc in next ch, 1dc in the next 17ch’s (Front), 3dc in next ch, 1dc in the next 8ch’s. (shoulder), 3dc in next ch, 1dc in the next 8ch’s (Back). Turn. (60dc + ch3)
2nd Row – (Inc Row) ch3, * 1dc in each dc to next 3dc group, 1dc in next dc, 3dc in centre dc of 3dc group, * rpt from * to * to last 3dc group, 1dc in next dc, 3dc in centre dc of 3dc group, 1dc in each dc to end, work 1dc in top of ch3. Turn. (68dc + ch3)
3rd to 8th Row – rpt 2nd Row. Turn. (116dc + ch3) #
9th Row – (Inc & Divide for Armholes) – ch3, 1dc in next dc, * 2dc in next dc, 1dc in next dc,* rpt from * to * to centre dc of the first 3dc group, 2dc in centre dc, skip next 24dc, (armhole) 1dc in centre dc of next 3dc group, rpt from * to * to centre dc of next 3dc group, skip next 24dc, (armhole) rpt from * to * to end, work 1dc in top of ch3, Turn. (101dc + ch3)
Commence Body – ch1, 1sc in stitch at the base of the ch1, * skip 1dc, (1ps, ch1, 1ps) in next dc, skip 1dc, 1sc in next dc, * rpt from * to * to last 4dc and ch3, skip 1dc, (1ps, ch1, 1ps) in next sc, skip 1sc, dec 1sc (see abbrev) over last dc and ch3. Turn. (25ps, groups) [see abbrev for ps stitch]
Pattern Row 1 – ch3, * (1ps, ch1, 1ps) in ch1 space of next ps group, 1dc in sc, * rpt from * to * to end. Turn.
Pattern Row 2 – ch1, 1sc in stitch at the base of the ch1, * (1ps, ch1, 1ps) in ch1 space of next ps group, 1sc in dc, * rpt from * to * to end, working last sc in top of ch3. Turn.
Rpt Pattern Rows 1 & 2 until 11ps rows have been worked from yoke or work measures approx 9.5 Inches from shoulder.
Work Pattern Row 1. Turn.
Divide for Legs
First Leg – Work Pattern Row 2 across 12, ps groups, skip dc, 1sc in ch1 space of next ps group, sl st to first sc on beginning of row to make a round. Turn leaving remaining stitches un-worked (will come back to for second leg). (12ps groups)
Second Row – ch3, skip 1sc, work * (1ps, ch1, 1ps) in ch1 space of next ps group, 1dc in sc, * rpt from * to * to last ps group, work (1ps, ch1, 1ps) in the ch1 space on group, sl st to top of ch3 on beginning of row. Turn.
Third Row – ch1, 1sc in stitch at the base of the ch1, * (1ps, ch1, 1ps) in ch1 space of next ps group, 1sc in dc, * rpt from * to * to last ps group, work (1ps, ch1, 1ps) in last ps group, sl st to first sc on beginning of row. Turn.
Fourth Row – ch3, * (1ps, ch1, 1ps) in ch1 space of next ps group, 1dc in sc, * rpt from * to * to last ps group, work (1ps, ch1, 1ps) in last ps group, sl st to top of ch3 on beginning of row. Turn.
Leg measures approx 2 Inches. (you can adjust leg length here if you wish, by working more or less rows)
Fifth Row – ch3, * 2dc in next ch1 space, 1dc in dc, * rpt from * to * to last ch1 space, 2dc in ch1 space, sl st to top of ch3 on beginning of row. Turn. (35dc + ch3)
Sixth Row – (Dec) ch1, 1sc in stitch at the base of the ch1, 1sc in each of next 6dc, * dec 1sc over next 2dc, (see abbrev) 1sc in each of next 7dc, * rpt from * to * to last 2dc, dec 1sc over last 2dc, sl st to first sc on beginning of row. (32sc)
Seventh Row – ch1, 1sc in stitch at the base of the ch1, 1sc in each sc to end, sl st to first sc on beginning of row. Fasten off.
Second Leg – Return to un-worked stitches at division and rejoin yarn to same ps group as first leg, ch1, 1sc in same space, skip 1dc, * (1ps, ch1, 1ps) in ch1 space of next ps group, 1sc in dc, * rpt from * to * to end, working last sc in top of ch3, sl st to first sc on beginning of row to make the round. Turn. (12ps groups)
Continue second leg same as the first leg, starting from Second Row. Fasten off
Button/Buttonhole Bands – (Instructions are given for a girl, swap sides for a boy)
With WS facing rejoin yarn to left hand side of back edge, (top of leg) ch1, 1sc in stitch at the base of the ch1, work 37 more sc evenly in row ends to neck edge, 3sc in corner, 1sc in each of the starting ch around neck, 3sc in corner, 38sc evenly in row ends down second back edge. Turn.
Buttonhole Row – ch1, 1sc in stitch at the base of the ch1, 1sc in next sc, * ch2, skip 1sc, 1sc in each of next 5sc, * rpt from * to * 5 more times, ch2, skip 1sc, 1sc in next sc. Turn. (7 buttonholes made)
Next Row – ch1, 1sc in stitch at the base of the ch1, 1sc in each ch2 space and sc to end. Fasten off.
Return to first back edge, with RS facing and starting from corner, work from neck downwards, ch1, work 1sc in stitch at the base of the ch1, 1sc in each sc to end. Turn.
Starting with ch1, 1sc in stitch at the base of the ch1 work 1 more row in sc. Fasten off.
Chain Tie x 2 – Using color 2, ch75, sl st in 2nd ch from hook and each ch along. Fasten off.
Finishing – Weave in any loose ends of yarn, attach buttons to correspond with buttonholes, working from back round to the front and securing chain ends to WS of body suit, thread chain ties through alternate dc’s under armholes and make a bow.
Bolero – Using color 2 rpt from # to # on bodysuit.
9th Row – rpt 2nd Row on bodysuit. Turn. (124dc + ch3)
10th Row – (Divide for Armholes) – ch3, 1dc in each dc to centre dc of the first 3dc group, 2dc in centre dc, skip next 26dc, (armhole) 2dc in centre dc of next 3dc group, 1dc in each dc to centre dc of next 3dc group, 2dc in dc, skip next 26dc, (armhole) 2dc in next dc, 1dc in each dc to end, 1dc in top of ch3, Turn. DNT. (76dc + ch3)
Button/Buttonhole Bands – Working along first front edge, ch1, 1sc in the stitch at the base of the ch1, work 19sc evenly in row ends to neck edge, 3sc in corner, 1sc in each of the starting ch around neck to next neck edge, 3sc in corner, work 20sc evenly in row ends down second front edge, 3sc in corner, work 1sc in each dc along the bottom of the bolero, 1sc in corner, sl st to first sc on beginning of row. Turn. Fasten off.
Neck Ties Row – With color 1 ch1, 1sc in stitch at the base of the ch1, work 1sc in each sc along bottom of bolero, 3sc in corner, 1sc in each sc up first front edge to neck, 1sc in corner, ch41, sl st in 2nd ch from hook and each ch to end, 2sc in corner, 1sc in each sc around neck to next neck edge, 2sc in corner, ch41, sl st in 2nd ch from hook and each ch to end, 1sc in corner, 1sc in each sc down second front, sl st to first sc on beginning of row. Turn.
Starting with ch1, 1sc in stitch at the base of the ch1, work one more row of 1sc in each sc to end, working 3sc in corners. Fasten off.
Sleeve x 2 – With color 2 and WS facing, join yarn to the side of the dc under arm, ch3, work 1dc in each of the next 26dc, 1dc in side of dc on the opposite side of armhole, sl st to top of ch3 on the beginning of row. Turn. (27dc + ch3)
Next Row – ch3, 1dc in each dc across, sl st to top of ch3 on beginning of row. Turn.
Rpt last row until 12 rows have been worked from yoke or under arm sleeve seem measures approx 5 inches. Fasten off.
Cuff – Working in BLO for this row, join in color 1, ch1, work 1sc in the stitch at the base of the ch1, skip 1dc, work (1ps, ch1, 1ps) in next dc, skip 1dc, * 1sc in next dc, (1ps, ch1, 1ps) in next dc, * rpt * to * to last dc, skip dc, sl st to sc on beginning of row. Turn. (7ps groups)
Rpt Fourth Row from legs on rompers.
Rpt Third Row from legs on rompers. Fasten off.
Finishing – Weave in and tie off any loose ends, turn back cuffs onto sleeves, tie neck ties in a bow.
Hope you enjoyed this crochet baby rompers-bolero.
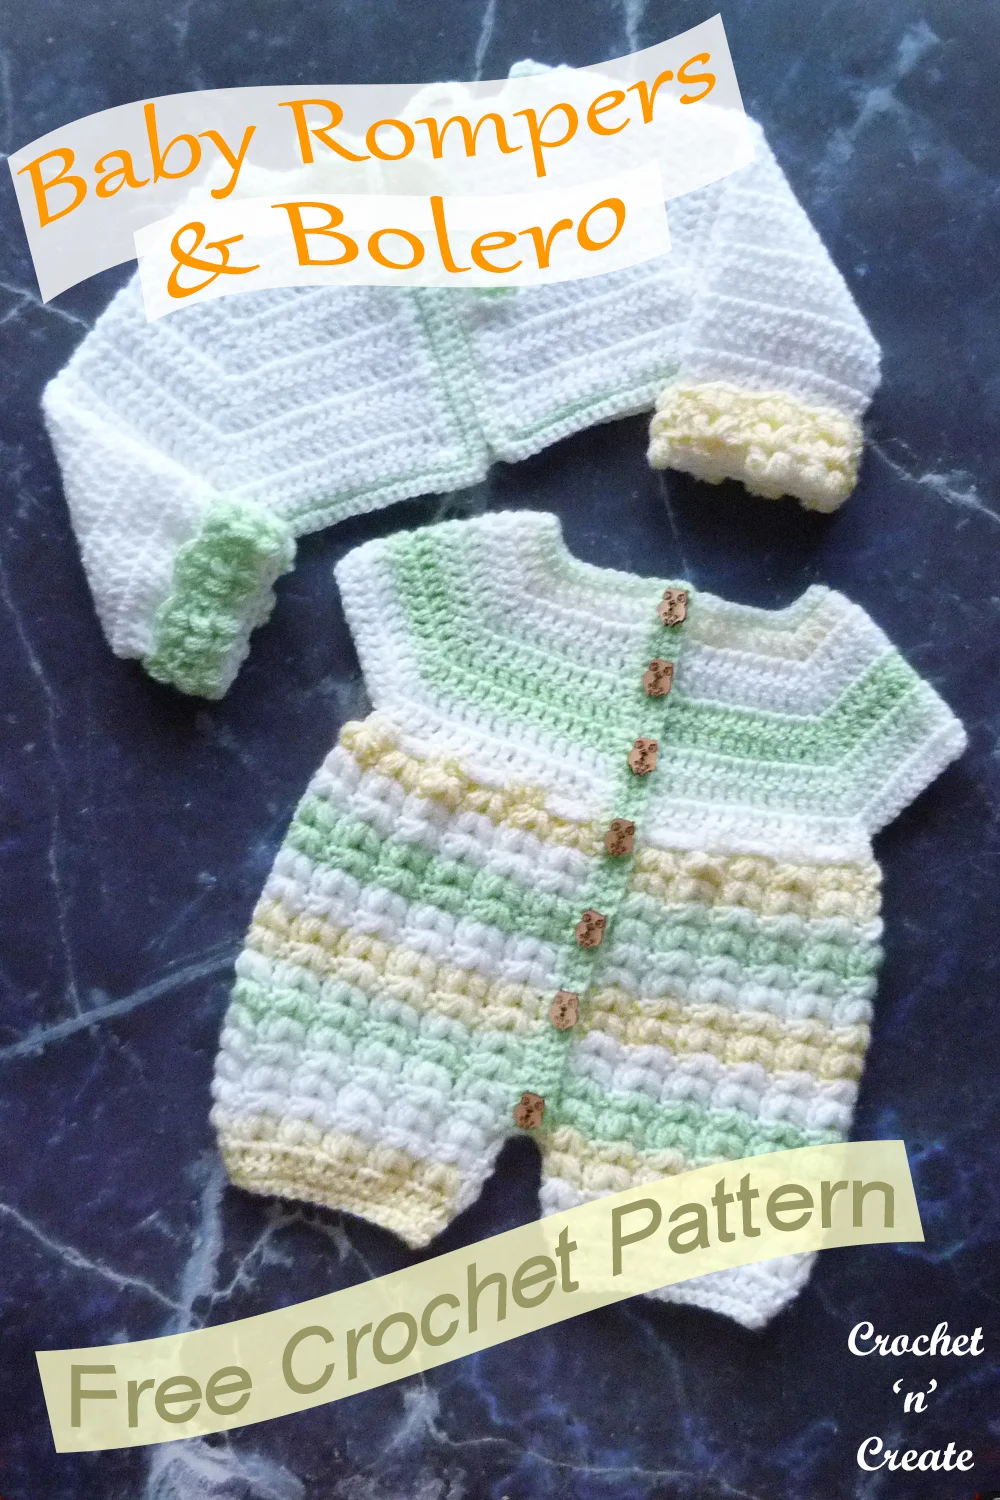
crochet baby rompers-bolero
All pattern sizing, yarn weights, gauges etc on this website are approx as everybody crochets differently. Every effort is made to ensure the free crochet patterns are correct, but I am only human so mistakes may be made, if you find one please let me know by e-mail on [email protected]
If you wish to tell your friends and followers about this pattern, please only use a direct link to the pattern page on crochet ‘n’ create. DO NOT share the written instructions for this free crochet baby rompers-bolero pattern.
~ I would love to see what you make
tag me on Facebook @crochetncreate ~
crochet baby rompers-bolero

